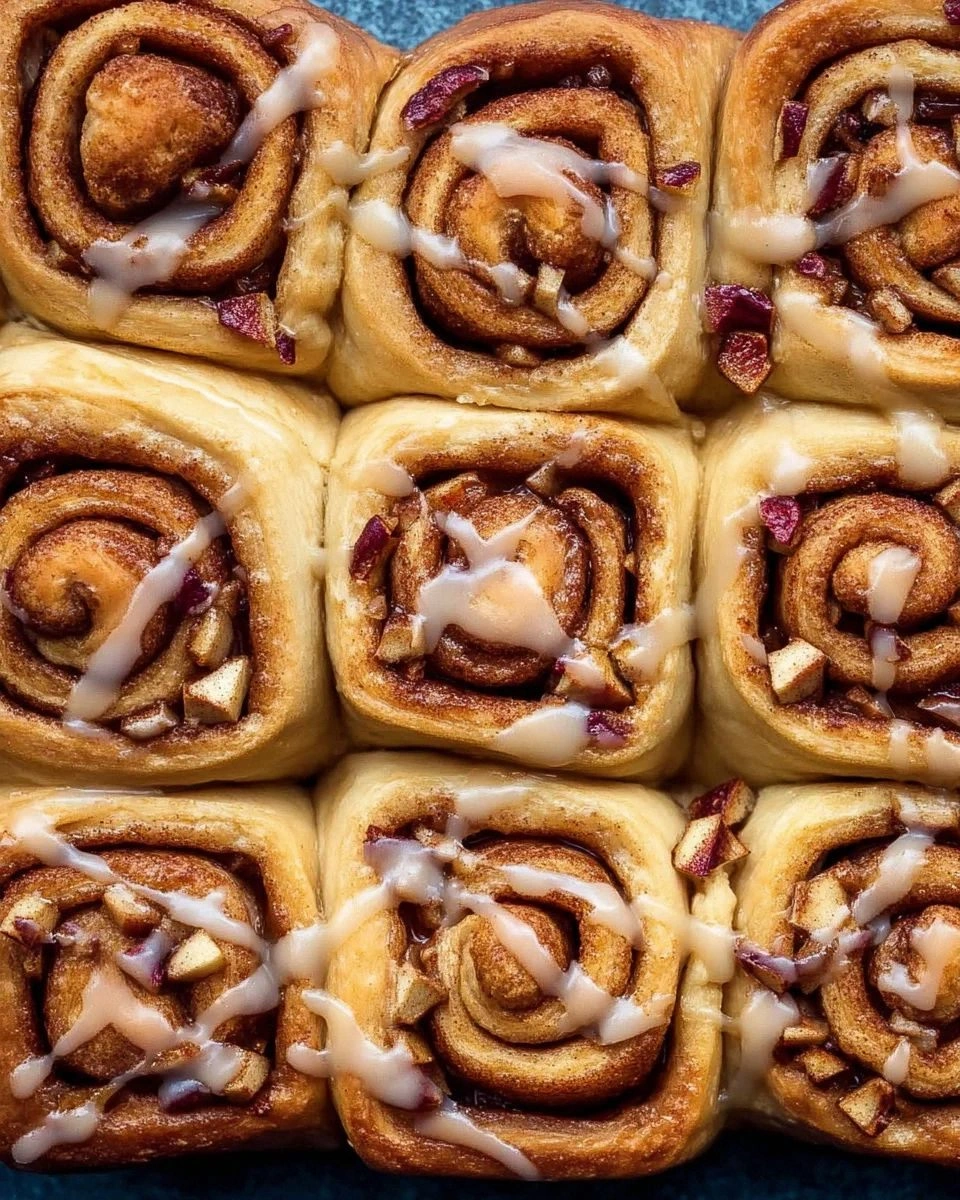
I still remember the day I ruined my grandmother's famous cinnamon rolls by adding too much nutmeg and forgetting the yeast. The kitchen smelled like disappointment and burnt spices, and I swore I'd never bake again. Fast forward three years, and here I am, practically evangelizing about the most incredible apple cinnamon rolls with brown butter maple icing that have ever graced my kitchen. The irony isn't lost on me. These aren't just any cinnamon rolls — they're the Rolls Royce of breakfast pastries, the kind that makes people cancel their dinner plans when they catch a whiff from your oven. The secret weapon? Brown butter that transforms into liquid gold, mingling with real maple syrup to create an icing that could probably solve world peace if we let it.
Picture this: It's 6 AM on a Saturday, and you're standing in your kitchen in mismatched socks, watching butter foam and sputter in the pan as it turns from yellow to amber to that perfect nutty brown. The smell is intoxicating — like toasted hazelnuts and caramel had a beautiful baby. Meanwhile, your dough is quietly proofing in a warm corner, doubling in size like it's showing off. The apples you caramelized earlier are cooling on the counter, their edges glistening with cinnamon and brown sugar, looking like tiny jewels you'd want to wear as jewelry. This is the moment when you realize you're not just making breakfast; you're creating a memory that'll haunt your dreams in the best possible way.
What makes these apple cinnamon rolls different from every other recipe cluttering the internet? For starters, I caramelize the apples before they ever meet the dough, concentrating their flavor until each piece tastes like apple pie filling that got a sophisticated makeover. Then there's the brown butter maple icing — oh, this isn't your typical powdered sugar glaze. We're talking about butter that's been coaxed into its nuttiest, most complex form, then whisked with pure maple syrup until it becomes something that might actually be illegal in several states. I dare you to taste this icing and not immediately start plotting ways to drizzle it on everything from ice cream to your morning coffee.
Let me walk you through every single step — by the end, you'll wonder how you ever made it any other way.
What Makes This Version Stand Out
These apple cinnamon rolls aren't just another pretty face in the breakfast pastry crowd. They're the result of three months of obsessive testing, three dozen failed attempts, and one very patient mail carrier who became my official taste tester. What emerged from this delicious chaos is a recipe that fixes everything that's wrong with traditional cinnamon rolls while amplifying everything that's right.
- Caramelized Apples: Most recipes throw raw apples into the filling, which releases water and creates soggy rolls. I sauté diced apples with butter, brown sugar, and cinnamon until they're concentrated flavor bombs that stay put and don't weep into your dough.
- Brown Butter Magic: While everyone else is using plain melted butter in their icing, we're taking it to the edge of burnt, creating nutty, toasty notes that make maple syrup taste like it graduated from an Ivy League school.
- Overnight Fermentation: The dough gets an overnight cold ferment that develops complex, slightly tangy flavors that make bakery owners jealous. Plus, you can prep everything the night before and just bake in the morning.
- Triple Cinnamon Hit: Cinnamon in the dough, cinnamon in the apple filling, and cinnamon in the icing. It's not overwhelming — it's orchestrated, like a cinnamon symphony where every note has its place.
- Texture Perfection: We're using bread flour for chew, cake flour for tenderness, and a touch of cornstarch for that delicate crumb that pulls apart in feathery layers.
- Make-Ahead Champion: These rolls can be frozen after shaping, refrigerated after baking, or even par-baked and finished later. Breakfast prep has never been this flexible or this impressive.
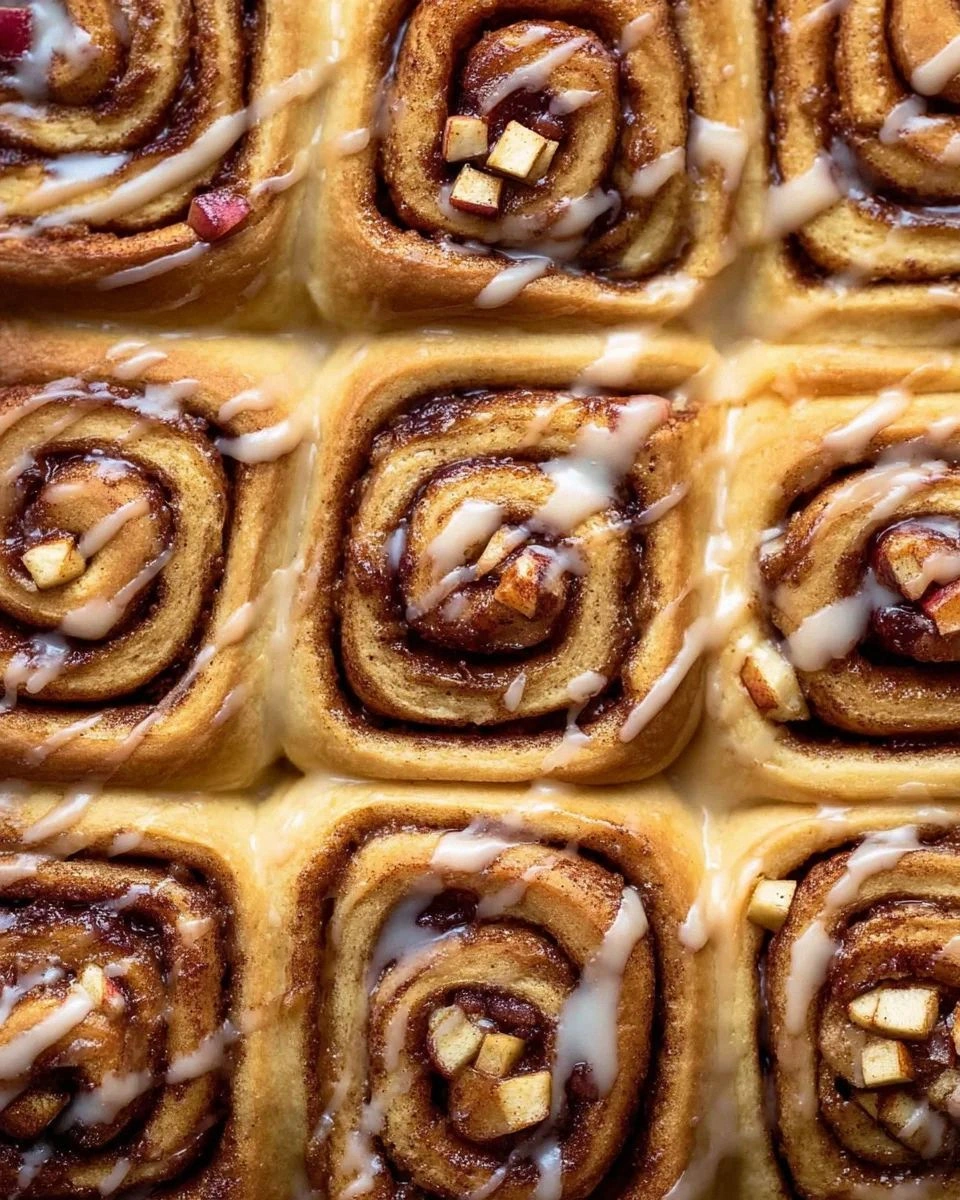
- Visual Drama: The icing gets poured on while the rolls are still warm, creating those gorgeous drips and pools that make people reach for their phones before their forks.
Alright, let's break down exactly what goes into this masterpiece...
Inside the Ingredient List
Every ingredient in these apple cinnamon rolls pulls double duty, creating layers of flavor that hit different parts of your palate. We're not just throwing things together willy-nilly here — each component has been tested, tasted, and perfected to create the ultimate breakfast experience. Think of it like casting a movie where every actor needs to steal the scene.
The Flavor Base
The dough starts with a combination of bread flour and cake flour — bread flour for structure and chew, cake flour for tenderness. This isn't some fancy chef trick; it's chemistry. Bread flour's higher protein content creates strong gluten networks that trap gas from the yeast, giving you those beautiful air pockets. Cake flour's lower protein keeps things tender, so you're not chewing through hockey pucks. The milk gets warmed to exactly 110°F — too hot and you'll murder your yeast, too cold and they'll sleep through the party. I use whole milk because fat carries flavor, and we're not about that watery life.
The Apple Alliance
For the apples, I'm loyal to Honeycrisp or Pink Lady — they hold their shape during caramelization and bring natural sweetness with a hint of tartness. Granny Smith works in a pinch, but they'll need an extra tablespoon of brown sugar to balance their acidity. The butter for caramelizing should be unsalted because we're controlling the salt levels like control freaks. Dark brown sugar instead of light brings molasses notes that make the apples taste like they were kissed by autumn itself.
The Spice Symphony
Ground cinnamon gets boring fast, so I use a blend of Ceylon cinnamon for warmth, Vietnamese cinnamon for punch, and a whisper of cardamom because it makes apples taste like they have secrets. Freshly grated nutmeg is non-negotiable — pre-ground nutmeg tastes like sawdust and disappointment. The salt isn't just salt — I use flaky sea salt because those little crystals hit your tongue in bursts, making everything else taste more like itself.
The Icing on the Roll
The brown butter needs to cool to room temperature before meeting the maple syrup, or you'll scramble the powdered sugar into a lumpy mess that looks like cottage cheese had an identity crisis. Speaking of maple syrup, use the real stuff — not the corn syrup impostor in the plastic lady-shaped bottle. Grade B (now called Grade A Dark) has the robust flavor that stands up to brown butter's nuttiness. Heavy cream gets added last, just enough to make the icing pourable but still thick enough to coat the rolls like velvet.
Everything's prepped? Good. Let's get into the real action...
The Method — Step by Step
- Start by warming your milk to precisely 110°F — use a thermometer here because guessing is how good intentions go to die. Sprinkle the yeast over the milk with a teaspoon of the measured sugar and let it bloom for 5 minutes. It should look like a science experiment gone right: foamy, bubbling, and alive. If it just sits there looking sad and unchanged, your yeast is dead (RIP) and you need to start over with fresher yeast or your rolls will be dense as doorstops.
- While the yeast is getting its groove on, whisk together the flours, salt, cinnamon, and sugar in the bowl of your stand mixer. Cut the softened butter into small cubes and work it into the flour mixture using the paddle attachment until it looks like coarse breadcrumbs. This creates little pockets of butter that melt during baking, creating tender, flaky layers. Don't overdo it — you're not making pie crust here.
- Add the yeast mixture, egg, and vanilla to the flour mixture and switch to the dough hook. Knead on medium-low speed for 8 minutes. The dough should be soft, slightly sticky, and elastic enough that you can stretch a piece thin enough to see light through without it tearing. If it's super sticky after 8 minutes, add flour a tablespoon at a time. If it's dry and shaggy, add milk a teaspoon at a time. This is where most people mess up — they add too much flour and end up with dense rolls.
- Form the dough into a ball and place it in a lightly oiled bowl, turning to coat. Cover with plastic wrap and let it rise in a warm spot for 1-2 hours until doubled in size. I preheat my oven to 200°F, turn it off, then place the dough inside with the door cracked. The gentle warmth is like a spa day for yeast. While you wait, make the apple filling.
- Melt 2 tablespoons of butter in a large skillet over medium-high heat. Add the diced apples and cook for 3 minutes without stirring — we want caramelization, not apple mush. Stir once, then cook another 2 minutes. Add the brown sugar, cinnamon, and salt, then cook 3-4 minutes more until the apples are tender and the sauce has thickened. Remove from heat and let cool completely. Warm apples will melt your butter when you're trying to roll these up.
- Roll the dough on a lightly floured surface into a 12x18-inch rectangle. Spread the softened butter for the filling over the dough, leaving a 1-inch border at the far edge. Sprinkle the brown sugar and cinnamon mixture evenly over the butter, then distribute the cooled apples. Press everything down gently so it sticks to the butter. Starting from the long edge closest to you, roll the dough into a tight log, pinching the seam to seal.
- Cut the log into 12 equal pieces using dental floss or a sharp serrated knife. Dental floss gives you clean cuts without squishing the rolls. Place them in a greased 9x13-inch pan, spacing them evenly. They should be touching but not crammed. Cover with plastic wrap and let rise another 45 minutes until puffy. Meanwhile, preheat your oven to 350°F.
- Bake for 25-30 minutes until the tops are golden brown and the centers register 190°F on an instant-read thermometer. The filling will be bubbling up around the edges like molten caramel. Let cool for 10 minutes before icing — any longer and the icing won't melt into all those nooks and crannies.
That's it — you did it. But hold on, I've got a few more tricks that'll take this to another level...
Insider Tricks for Flawless Results
After making these rolls more times than I care to admit (my neighbors started leaving anonymous notes asking if I was opening a bakery), I've discovered some game-changing techniques that separate amateur bakers from roll royalty. These aren't just tips — they're the difference between good rolls and the kind that people text you about at midnight.
The Temperature Rule Nobody Follows
Room temperature ingredients aren't just a suggestion — they're the law if you want consistent results. Cold eggs from the fridge will seize up your yeast mixture, creating little lumps of cooked egg that look like scrambled eggs floating in milk. Take your egg out 30 minutes before baking, or warm it quickly by placing it in a bowl of warm water for 5 minutes. Same goes for your butter for the filling — it needs to be soft enough to spread but not melted. Think toothpaste consistency, not soup.
Why Your Nose Knows Best
Brown butter is ready when it smells like you're walking through a hazelnut orchard in autumn, not when it looks a certain color. The visual cues lie — depending on your pan and stove, the color can be deceiving. But that nutty, toasted aroma? That's universal. The moment you catch that scent, pull it off the heat and pour it into a heat-proof bowl. The milk solids will keep browning from residual heat, and if you leave it in the pan, you'll end up with burnt butter that tastes like disappointment and regret.
The 5-Minute Rest That Changes Everything
After you roll and cut your rolls, let them rest for exactly 5 minutes before the final proof. This relaxes the gluten that got all worked up during rolling, preventing your rolls from springing back and becoming tough. It's like giving your dough a mini spa treatment. During this rest, the butter in the filling firms up slightly, preventing it from leaking out during baking and creating that gorgeous caramelized bottom that makes people fight over the corner pieces.
The Freezer Trick for Clean Cuts
Pop your rolled log into the freezer for 15 minutes before cutting. This firms up the butter and makes clean, sharp cuts that don't squish your beautiful spiral. Use unflavored dental floss for cutting — slide it under the log, cross the ends over the top, and pull. Each cut is perfectly round and the filling stays put instead of getting smeared everywhere. If you don't have dental floss, use a very sharp serrated knife and cut with a gentle sawing motion, not pressure.
The Steam Secret for Soft Rolls
Place a metal baking pan on the bottom rack of your oven while it preheats. When you put the rolls in, pour a cup of hot water into the hot pan and quickly close the oven door. The steam creates a humid environment that keeps the tops of your rolls soft while the bottoms get crispy and caramelized. It's like giving your rolls a professional steam injection that bakery ovens have, but without the $10,000 equipment.
Creative Twists and Variations
This recipe is a playground. Here are some of my favorite ways to switch things up:
Pear and Cardamom Rolls
Swap the apples for ripe Bartlett pears and replace the cinnamon with freshly ground cardamom. The pears become silky and almost custard-like when caramelized, and cardamom brings this exotic floral note that makes people ask "what is that amazing flavor?" Add a pinch of black pepper to the filling — it sounds weird but it makes the cardamom pop in the most incredible way.
Caramel Apple Pecan Sticky Buns
Before placing the cut rolls in the pan, pour a mixture of melted butter, brown sugar, and corn syrup in the bottom, then sprinkle with toasted pecans. When you flip these out after baking, you've got sticky buns with a pecan praline topping that'll make grown adults weep with joy. The caramel from the apples mingles with the sticky topping to create something that's basically apple pie and pecan pie had a beautiful baby.
Savory Breakfast Rolls
Replace the apple filling with crispy bacon, sharp cheddar, and caramelized onions. Keep the brown butter but swap the maple syrup for honey and add fresh thyme. These are insane for brunch — the sweet and savory combo hits every craving at once. I serve these with a fried egg on top and watch people descend into food comas of happiness.
Pumpkin Spice Version
Add 1/4 cup pumpkin puree to the dough and replace the apples with roasted pumpkin cubes tossed in pumpkin pie spice. The brown butter maple icing becomes even more crucial here — it's like pumpkin spice latte in roll form but actually good, not the basic version that coffee shops pawn off on us every fall.
Salted Caramel Apple
Drizzle homemade salted caramel over the apple filling before rolling, then sprinkle with flaky sea salt. The caramel creates little pockets of gooey sweetness that burst when you bite into them. Don't use store-bought caramel — it has stabilizers that prevent it from melting properly. Make your own or use dulce de leche thinned with a splash of cream.
Bourbon Apple Cinnamon Rolls
Add a tablespoon of bourbon to the apple filling while caramelizing — the alcohol cooks off but leaves behind these incredible vanilla and oak notes. Replace the vanilla in the icing with bourbon too, but use less since it's stronger. These are dangerous — they taste like New Orleans in breakfast form, and people will ask for your recipe before they finish their first roll.
Storing and Bringing It Back to Life
Fridge Storage
Store leftover rolls in an airtight container at room temperature for up to 2 days. Don't refrigerate them — the cold makes the starches retrograde and turns your soft rolls into hockey pucks. If your kitchen is warm (above 75°F), store them in the coolest part of your house, like a pantry or even the garage if it's climate-controlled. The icing will firm up but that's fine — warm rolls for 10 seconds in the microwave and they'll taste fresh-baked.
Freezer Friendly
These rolls freeze beautifully at two stages: after shaping but before the final proof, or after baking and cooling completely. For unbaked rolls, flash-freeze them on a baking sheet for 2 hours, then transfer to freezer bags. They'll keep for 2 months. When ready to bake, thaw overnight in the fridge, then let them proof for 1 hour before baking as directed. For baked rolls, wrap individually in plastic wrap, then foil, and freeze for up to 1 month. Thaw at room temperature for 2 hours, then warm in a 300°F oven for 10 minutes.
Best Reheating Method
Skip the microwave for reheating more than one roll — it makes the bottoms soggy and the icing melt into a puddle. Instead, wrap rolls in foil and warm in a 300°F oven for 10-12 minutes. For that fresh-baked taste, brush with a little melted butter before warming. If you're reheating a single roll, microwave it for 8-10 seconds with a small cup of water next to it — the water creates steam that keeps the roll soft. The water trick is a game-changer for any bread reheating situation.