Picture this: the kitchen is a battlefield, the stove is a ticking time bomb, and you’re staring at a pile of unripe cassava that looks like it’s been through a war. The last time I tried to make fries from cassava, I ended up with a soggy, rubbery mess that even my cat refused to touch. I was determined to turn that disaster into a triumph, and I’m not kidding when I say I spent a whole evening tweaking, tasting, and testing until the moment I finally hit that golden, crackling crunch.
I’m talking about the kind of aroma that makes your nose do a little dance, the sound of a sizzle that feels like a tiny applause, the sight of perfectly cut sticks that gleam under the oven lights, the feel of a crisp bite that snaps like thin ice, and the taste that delivers a punch of savory, smoky, and citrusy notes all at once. Every sense is on full alert, and the kitchen feels like a stage where I’m the star chef and the audience is my taste buds. I’ve got the recipe, the technique, and the confidence to make you wonder why you ever settled for store‑bought fries.
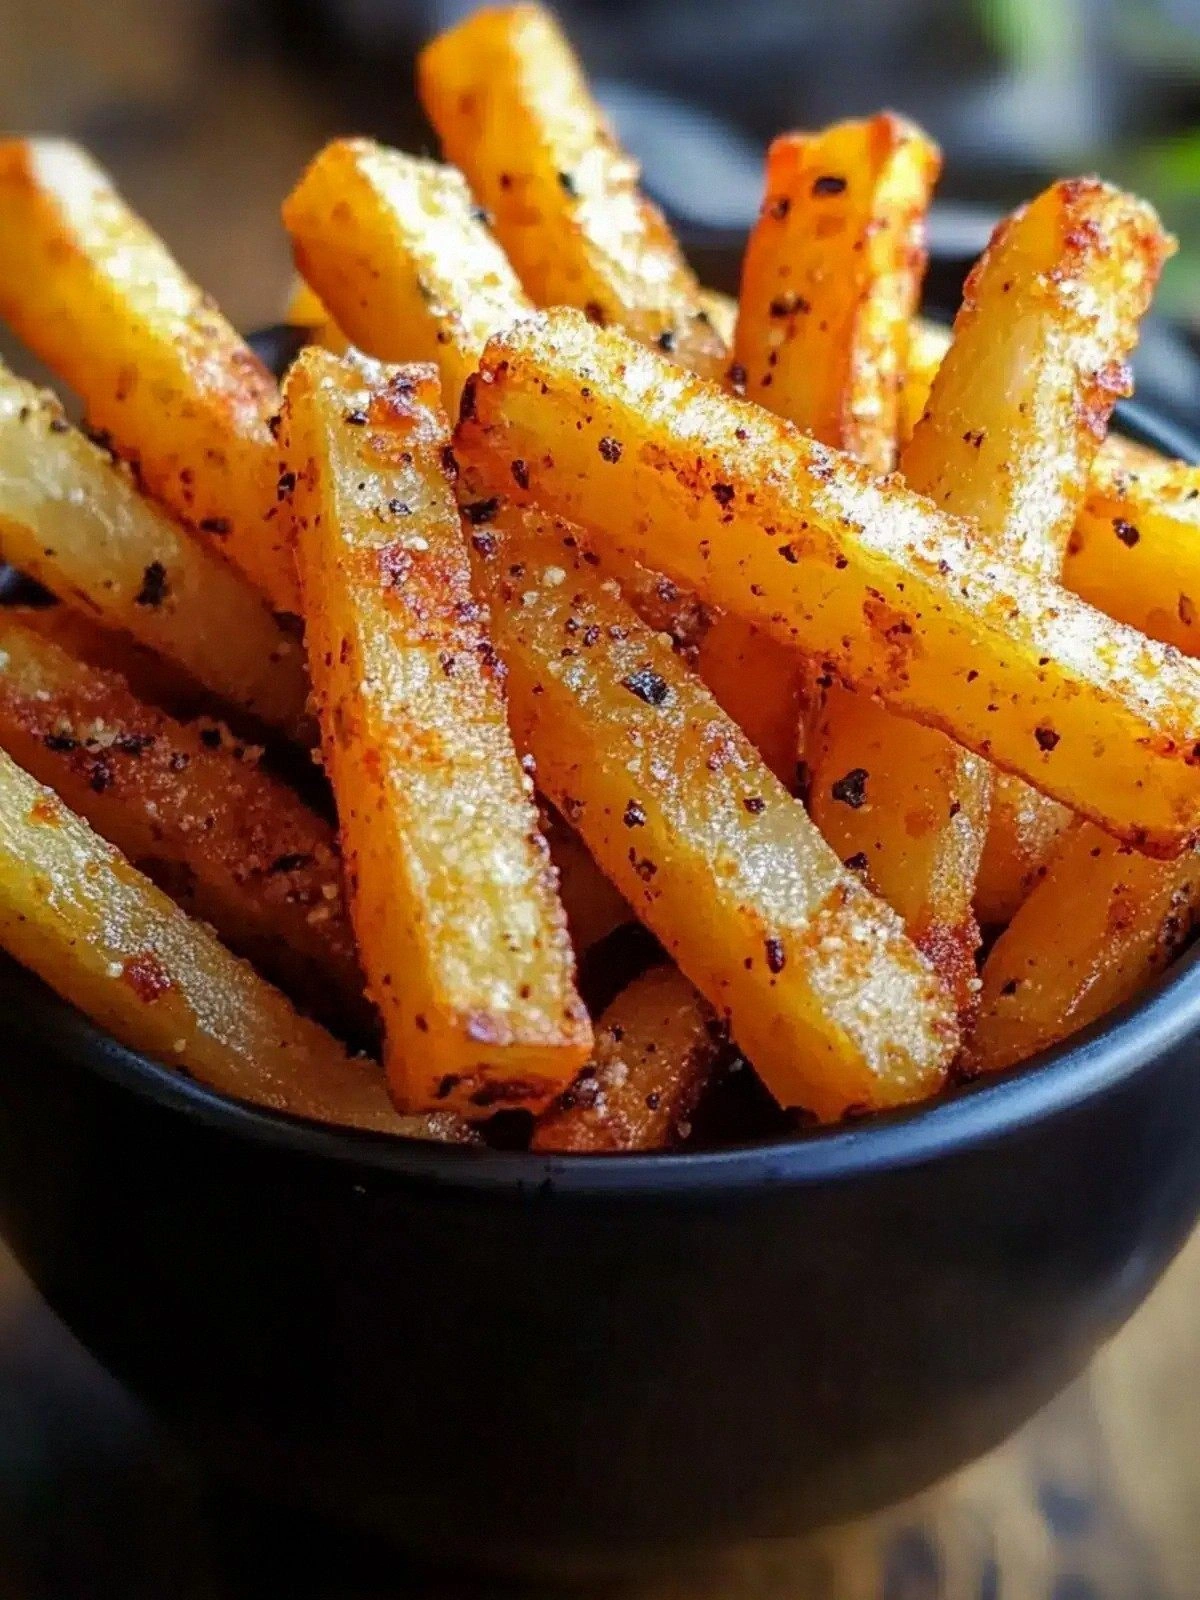
The secret sauce? A surprisingly simple blend of olive oil, a handful of spices, and a dash of lime that transforms cassava into a snack that’s both healthy and utterly addictive. I’ll show you how to cut, season, and bake the cassava so that each fry is uniformly crisp, not burnt, and has that satisfying snap that makes you want to eat a second portion. It’s not just another side dish; it’s a game‑changer that will have your friends begging for the recipe.
I dare you to taste this and not go back for seconds. I promise the flavor profile is bold, the texture is unmistakable, and the overall experience is unforgettable. Most recipes get this completely wrong by over‑baking or under‑seasoning, but I’ve cracked the code. The result is a dish that’s hands down the best version you’ll ever make at home.
I’ll be honest — I ate half the batch before anyone else got to try it. The first bite was a revelation, the second was a confession, and the third was a guilty pleasure. The moment the fries hit the plate, the whole kitchen smelled incredible, and the anticipation was palpable.
If you’ve ever struggled with getting cassava crispy, you’re not alone — and I’ve got the fix. The trick lies in the prep, the seasoning, and the baking technique that ensures each fry is golden on the outside and tender on the inside. I’ll walk you through every single step, from peeling and cutting to seasoning and baking, so that you can replicate this at home with confidence.
Picture yourself pulling this out of the oven, the whole kitchen smelling incredible, the fries sizzling on the tray, and the anticipation building. The moment you lift the tray, the aroma will hit you like a wave, and the first bite will confirm that you’ve found the perfect balance of crunch and flavor. The fries will be so good that you’ll want to share them, but you’ll also want to keep them all for yourself.
Let me walk you through every single step — by the end, you'll wonder how you ever made it any other way.
What Makes This Version Stand Out
- Taste: The combination of paprika, garlic powder, and fresh lime gives the fries a bright, smoky flavor that cuts through the natural sweetness of cassava. The lime adds a zesty lift that keeps the dish from feeling heavy. The result is a flavor profile that feels both comforting and adventurous.
- Texture: The careful slicing and double‑baking technique creates an exterior that is crisp and a core that remains tender. The fries hold their shape even when you toss them around the plate. The crunch is satisfying without being brittle.
- Ingredient Quality: Using fresh, firm cassava ensures a firm bite, while high‑quality olive oil adds depth without overpowering the other flavors. The fresh parsley adds a subtle herbal note that brightens the dish. Each ingredient is chosen for its ability to elevate the final result.
- Method Simplicity: The recipe requires only a few steps and minimal equipment, making it accessible to both beginners and seasoned cooks. No special gadgets are needed; a baking sheet, a mixing bowl, and an oven are all you need. The process is straightforward, yet each step is crucial for the final outcome.
- Uniqueness: The inclusion of lime wedges as a garnish adds a refreshing contrast that most cassava fry recipes overlook. The sprinkle of parsley gives a fresh finish that sets this version apart. The overall dish feels like a modern take on a classic snack.
- Make‑ahead Potential: The fries can be prepared in advance, refrigerated, and baked fresh when needed. This makes them perfect for parties or busy weeknights. The flavor remains consistent even after storage.
Alright, let's break down exactly what goes into this masterpiece.
Inside the Ingredient List
The Flavor Base
The olive oil is the foundation that binds all the seasonings together, allowing them to coat the cassava evenly. It also provides a subtle richness that balances the earthiness of the root. If you skip the oil, the fries will come out dry and the spices will not adhere properly.
Swap the olive oil for avocado oil if you’re looking for a higher smoke point or a milder flavor. Avocado oil will still deliver a buttery finish without altering the overall taste. The key is to use an oil that can withstand the baking temperature without burning.
The Texture Crew
Cassava is the star of the show, and its starch content gives the fries their unique bite. A firm, fresh cassava will yield a crisp exterior while maintaining a tender interior. If you use a pre‑cooked or frozen cassava, the texture will suffer and the fries will become mushy.
When selecting cassava, look for smooth, unblemished skin and a firm flesh. Avoid any greenish or wrinkled spots, as these indicate spoilage. A good rule of thumb is to pick cassava that feels heavy for its size.
The Unexpected Star
Fresh parsley adds a pop of color and a subtle herbal note that brightens the dish. It also provides a fresh contrast to the smoky paprika. Without parsley, the fries would feel flat and lack that final finishing touch.
If you’re allergic to parsley or simply don’t have it on hand, you can replace it with cilantro or basil for a different herbal profile. Each herb will bring its own unique aroma, so feel free to experiment.
The Final Flourish
Lime wedges are the secret weapon that adds a bright citrus zing, cutting through the richness of the oil and spices. The acidity lifts the overall flavor profile, making the fries feel fresh and vibrant. Without lime, the dish would taste heavy and one‑dimensional.
If you prefer a sweeter twist, you can add a drizzle of honey or a sprinkle of sugar before baking. This will caramelize slightly, creating a sweet and savory balance that pairs well with the spices.
Everything's prepped? Good. Let's get into the real action.
The Method — Step by Step
- First, preheat your oven to 425°F (220°C). Line a large baking sheet with parchment paper to prevent sticking. This ensures even heat distribution and easy cleanup.
- While the oven warms, peel the cassava using a sharp knife. Trim the ends and slice the cassava into sticks about 1/2 inch thick. Uniform thickness guarantees consistent baking.
- Place the sliced cassava in a large bowl and drizzle with olive oil. Toss until every piece is lightly coated; this helps the spices adhere and creates a crispier surface.
- In a small bowl, mix together salt, black pepper, garlic powder, paprika, and a pinch of fresh parsley. This blend forms the flavor base that will envelop each fry.
- Sprinkle the spice mix over the oiled cassava sticks and toss again until the seasoning is evenly distributed. The aroma that follows is a promise of what’s to come.
- Arrange the seasoned sticks in a single layer on the prepared baking sheet, making sure they do not overlap. Overcrowding will cause the fries to steam instead of bake, reducing crispness.
- Bake for 20 minutes, then flip each fry with a spatula. This second exposure to heat ensures both sides achieve a golden, crunchy finish.
- Return to the oven and bake for an additional 10–12 minutes, or until the edges are golden brown and the fries feel firm to the touch. Watch closely; the last few minutes are crucial for that perfect snap.
- Remove the tray from the oven and let the fries rest for 5 minutes. This brief rest allows the steam to escape and the crust to set.
- Serve immediately with lime wedges and a sprinkle of fresh parsley. The citrus brightness and herbal finish elevate the flavor to a whole new level.
That's it — you did it. But hold on, I've got a few more tricks that'll take this to another level.
Insider Tricks for Flawless Results
The Temperature Rule Nobody Follows
Many people bake at 400°F, but this temperature can cause uneven browning. Baking at 425°F ensures the outer layer crisps up faster while the interior stays tender. If your oven tends to run hot, lower the temperature to 420°F to prevent scorching.
Why Your Nose Knows Best
The aroma that begins to develop after the first 10 minutes is a clear indicator that the fries are halfway there. If the scent is still mild, give them a few more minutes. Trust your nose; it’s a reliable guide.
The 5-Minute Rest That Changes Everything
Letting the fries sit for five minutes after baking allows the steam to escape and the crust to firm up. This simple pause ensures the fries stay crispy even when served immediately. Skipping this step often results in soggy edges.
Keep It Cool with a Cooling Rack
Place the fries on a wire rack after baking to keep them from steaming on a flat surface. The airflow keeps each piece crisp. If you don’t have a rack, let them rest on a paper towel‑lined sheet.
Seasoning at the Right Time
Adding the spices after oiling the cassava ensures even coverage. If you season too early, the spices may stick to the bowl and not coat the fries properly. Tossing after oiling is the secret to uniform flavor.
Freshness Is Key
Fresh cassava yields the best results. If you’re using frozen cassava, thaw it fully and pat it dry before seasoning. Moisture on the surface can prevent proper crisping.
Creative Twists and Variations
Spicy Sriracha Kick
Swap the paprika for a blend of sriracha and chili powder. The heat adds a fiery edge that pairs wonderfully with the lime. This variation is perfect for those who love a spicy bite.
Herb‑Infused Mediterranean
Replace the parsley with a mixture of dried oregano, thyme, and rosemary. Add a splash of lemon juice instead of lime for a bright, zesty finish. This version feels like a Mediterranean street food.
Sweet & Salty Caramelization
Drizzle a light coat of honey over the fries before baking. The honey will caramelize, creating a sweet glaze that contrasts the savory spices. This twist is ideal for dessert‑style cravings.
Cheesy Crunch
After baking, sprinkle grated Parmesan or crumbled feta over the hot fries. The cheese melts slightly, creating a gooey, salty layer. This adds a decadent touch to the dish.
Asian Fusion
Use a sauce made of soy sauce, sesame oil, and a touch of rice vinegar to coat the fries after baking. Garnish with sliced scallions and toasted sesame seeds. This gives the fries an umami, Asian‑style flavor.
Vegan Protein Boost
Top the fries with a sprinkle of nutritional yeast for a cheesy, savory taste. Pair them with a side of guacamole or tahini dip. This variation adds protein without compromising the vegan profile.
Storing and Bringing It Back to Life
Fridge Storage
Cool the fries completely before placing them in an airtight container. Store them in the refrigerator for up to 3 days. The fries will stay crisp if you reheat them in a hot oven.
Freezer Friendly
Flash‑freeze the fries on a parchment‑lined tray before transferring them to a freezer bag. They can be stored for up to 2 months. Bake directly from frozen at 425°F for 15–20 minutes.
Best Reheating Method
Preheat the oven to 400°F and place the fries on a baking sheet. Add a splash of water to the tray, cover loosely with foil, and bake for 5 minutes. The water steams the fries, restoring crispness without drying them out.