I was halfway through a week of bland dinners when the oven alarm rang like a rogue alarm clock, and I stared at the scorched top of a casserole that had turned into a charcoal masterpiece. I was about to throw up my hands, but I remembered a dare from a foodie friend: “Make the best three‑cheese manicotti you’ve ever tasted, or I’ll make the world’s best lasagna.” That night, the kitchen smelled of triumph and garlic, and I was determined to turn that culinary catastrophe into a triumph.
Picture this: the steam curling off the oven, the rich aroma of melted mozzarella and parmesan dancing with the sharp tang of ricotta, the sizzle of olive oil as it meets garlic, and the sound of a bubbling marinara that feels like a warm hug. Every bite is a contrast of creamy filling and crisp, golden edges, a harmony that makes the whole room feel like a cozy, cheesy sanctuary. If you’ve ever felt that your pasta dishes lacked that “wow” factor, this recipe is going to be the turning point you didn’t know you were missing.
What sets this version apart is the meticulous layering of textures and the secret infusion of fresh herbs that lift the cheese from ordinary to unforgettable. I dare you to taste this and not go back for seconds; I’ve already eaten half the batch before anyone else even had a chance to try it. The sauce coats the pasta like velvet, and the crispy edges shatter like thin ice when you bite through them. This is hands down the best version you'll ever make at home, and it will change the way you think about comfort food forever.
Stay with me here—this is worth it. Let me walk you through every single step, from selecting the perfect manicotti shells to the final golden crust, and by the end, you'll wonder how you ever made it any other way.
What Makes This Version Stand Out
- Cheese Harmony: The combination of ricotta, mozzarella, and parmesan creates a layered flavor that melts into a silky, savory blanket for every bite.
- Texture Contrast: The manicotti shells are baked until just crisp, delivering a satisfying crunch that balances the creamy filling.
- Fresh Herb Boost: A touch of oregano and basil lifts the dish, giving it a bright, aromatic finish that sets it apart from generic versions.
- Make‑Ahead Friendly: Assemble the dish the night before, refrigerate, and bake it in the morning—perfect for busy weekdays.
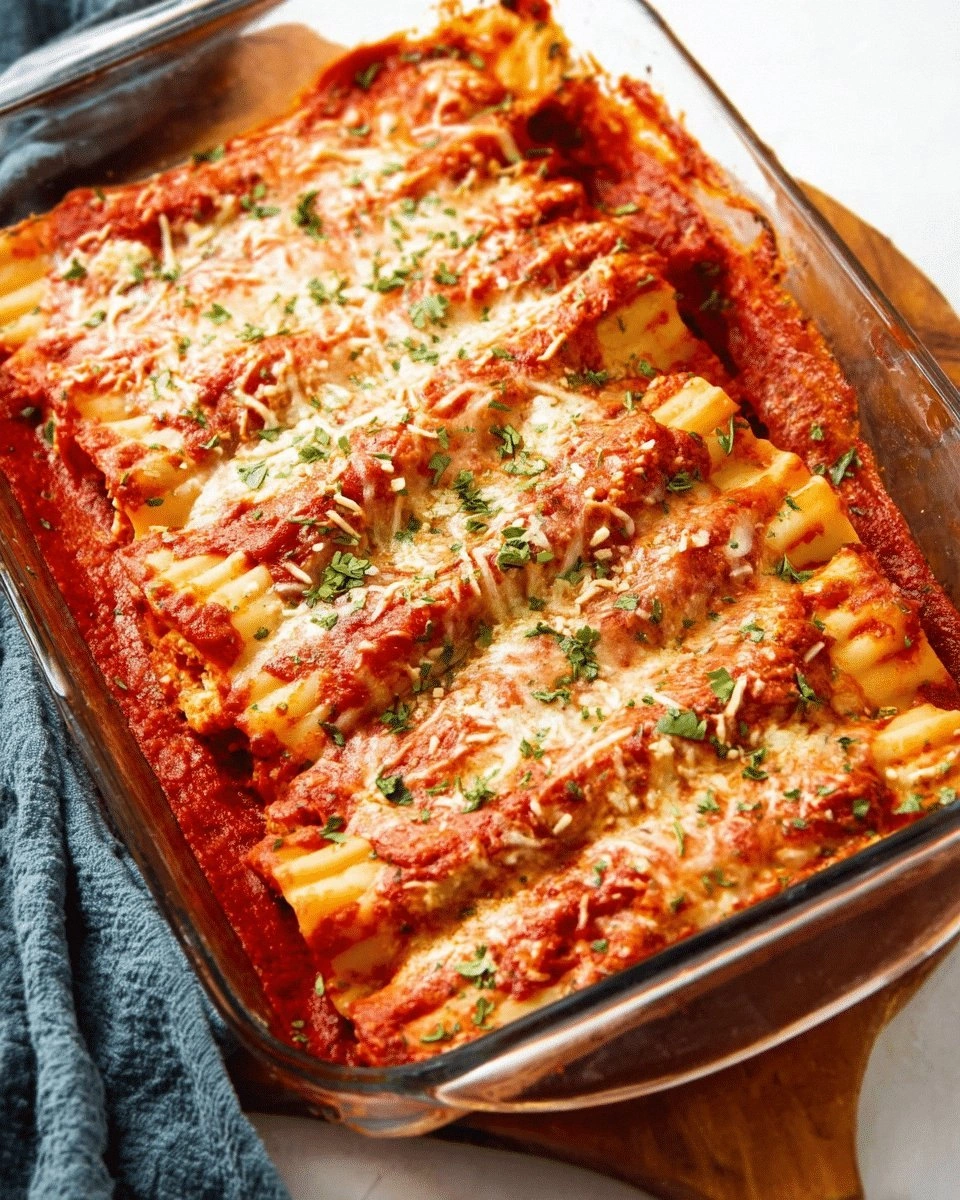
- Visual Appeal: The golden cheese crust and bubbling sauce make this dish Instagram‑ready, turning every plate into a masterpiece.
- Kid‑Friendly Flavor: The mild, cheesy profile is a hit with children, while the herbs add depth for the adults.
- Versatile Base: Swap the marinara for a béchamel or a white wine cream sauce for a gourmet twist without changing the core.
Alright, let's break down exactly what goes into this masterpiece…
Inside the Ingredient List
The Pasta Foundation
Manicotti shells are the backbone of this dish. Choose fresh or frozen tubes—just make sure they’re sturdy enough to hold the filling without breaking. If you’re using fresh pasta, blanch it for 2 minutes to set the texture before filling. Skipping this step can lead to mushy shells that collapse during baking.
The amount of pasta directly affects the ratio of cheese to shell. Too many shells and the dish becomes pasta‑heavy; too few and the filling overwhelms. A 12‑shell pack is the sweet spot for four servings, giving each bite a balanced bite of pasta and cheese.
The Creamy Core
Ricotta is the star of the filling. Its mild, slightly sweet flavor serves as a neutral canvas for the other cheeses. If you can’t find ricotta, a blend of cottage cheese and cream cheese works as a substitute, but the texture will be a bit denser.
Mozzarella adds the meltiness that makes the filling ooze when you cut into it. Use shredded mozzarella for even distribution. The parmesan contributes a sharp, nutty finish that balances the creaminess. Together, they create a cheese symphony that sings with every bite.
The Flavor Enhancer
Garlic and dried oregano infuse the dish with aromatic depth. Minced garlic should be sautéed in olive oil until golden before adding the marinara, which prevents a raw, sharp bite. If you’re sensitive to garlic, use a smaller amount or a garlic‑free sauce; the dish will still shine.
A pinch of black pepper and a dash of salt keep the flavors balanced. Too much salt can overpower the cheeses, while too little will leave the dish flat. Taste the sauce as it simmers and adjust accordingly.
The Final Flourish
The top layer of shredded mozzarella and a sprinkle of parmesan creates a golden, bubbly crust that’s both visual and textural perfection. If you prefer a crispier top, broil the dish for the last 2 minutes until the cheese turns a deep amber. Be careful not to burn; the cheese will smoke if left too long.
For an extra pop of color and flavor, a handful of fresh basil leaves can be added on top just before serving. This small touch elevates the dish from comforting to celebratory.
Everything's prepped? Good. Let's get into the real action…
The Method — Step by Step
- Step 1: Preheat the oven to 375°F (190°C). While the oven warms, bring a large pot of salted water to a rolling boil. The heat sets the stage for perfectly al dente shells that hold their shape during baking. Feel the anticipation building as the kitchen fills with the scent of impending comfort.
- Step 2: Cook the Shells add the manicotti tubes to the boiling water and cook for 8–10 minutes, or until just tender. Drain and rinse under cold water to stop the cooking process. Toss the shells with a tablespoon of olive oil to prevent sticking—this simple step saves you from a sticky mess later.
- Step 3: Prepare the Filling in a bowl, combine ricotta, shredded mozzarella, grated parmesan, minced garlic, and a pinch of salt and pepper. Mix until smooth, adding a splash of milk if the mixture feels too thick. The filling should be creamy enough to spoon but thick enough to stay inside the shells. Kitchen Hack: Whisk the cheeses with a small amount of milk to achieve a silky consistency that spreads evenly in each tube.
- Step 4: Assemble spoon the cheese mixture into each shell, then place the filled shells in a lightly greased 9×13-inch baking dish. Arrange them snugly but not touching to ensure even baking. This step is the heart of the dish; watch the filling rise as you fill the shells, and imagine the future gooey center.
- Step 5: Add the Sauce pour the marinara sauce over the assembled shells, covering them completely. The sauce should reach just below the tops of the shells, allowing the cheese to bubble without drowning. Watch Out: If you overfill with sauce, the cheese can leak out during baking, creating a soggy mess. Keep the sauce level just right for a perfect balance.
- Step 6: Cover and Bake loosely cover the dish with foil and bake for 25 minutes. The foil traps steam, helping the cheese melt evenly and the sauce to thicken. After 25 minutes, remove the foil, sprinkle the top with shredded mozzarella and parmesan, then return to the oven for an additional 10 minutes or until the cheese is bubbly and golden. Kitchen Hack: If you prefer a crispier top, broil for 2 minutes at the end—just keep a close eye to avoid burning.
- Step 7: Rest let the dish rest for 5 minutes after removing it from the oven. This pause allows the filling to set, preventing a runny mess when you cut into it. The aroma will still be intoxicating, and the steam will rise like a savory cloud.
- Step 8: Serve slice the dish into portions and serve hot, perhaps with a side of garlic bread or a fresh green salad. The first bite will melt the cheese, and the next will reveal the tender pasta—an unforgettable harmony that satisfies both palate and soul.
That’s it — you did it. But hold on, I've got a few more tricks that'll take this to another level…
Insider Tricks for Flawless Results
The Temperature Rule Nobody Follows
Many cooks bake at 400°F, but 375°F gives the cheese a slower melt, allowing the sauce to thicken without scorching. This subtle difference keeps the flavors balanced and the texture silky. I once baked at a higher temperature and ended up with a burnt top and a soggy filling—don’t make that mistake.
Why Your Nose Knows Best
The first smell that hits you is the caramelized garlic and tomato. Trust that aroma—it signals that the sauce has reduced enough to deepen its flavor. If the sauce still smells raw, give it a few more minutes of simmering; the aroma will shift toward a richer, sweeter profile.
The 5-Minute Rest That Changes Everything
Letting the dish rest after baking allows the cheese to set, making the filling less likely to ooze when you cut into it. A quick 5‑minute pause also lets the flavors meld, turning a good dish into a great one. I’ve seen people skip this step and end up with a chaotic mess—don’t be one of them.
The No‑Leak Filling Technique
If you’ve ever filled shells only to have the cheese spill out during baking, you’re not alone. The trick is to lightly press the filling into the shell so it adheres without overfilling. A small spoon or a piping bag works wonders for precision.
The Quick Broil Trick
Want a golden, bubbly crust without waiting? After the 25‑minute bake, remove the foil, sprinkle the cheese, then broil for 2 minutes. Keep a close eye on the cheese; it can go from perfect to charred in seconds.
The Fresh Herb Finale
A handful of chopped fresh basil or parsley on top before serving adds a burst of color and a fresh, herbal note that cuts through the richness. If you’re not a fan of herbs, a sprinkle of crushed red pepper can give a subtle kick.
Creative Twists and Variations
This recipe is a playground. Here are some of my favorite ways to switch things up:
Mediterranean Medley
Swap the marinara for a white sauce infused with sun‑dried tomatoes and olives. Add feta crumbles to the filling for a briny contrast that pairs beautifully with the creamy cheeses.
Spicy Pepperoni Version
Fold in thinly sliced pepperoni into the filling and sprinkle crushed red pepper flakes over the top before baking. The heat will dance with the cheese, creating a bold, indulgent flavor profile.
Vegetarian Veggie Delight
Add sautéed spinach, zucchini, and mushrooms to the filling, and use a vegetable broth instead of marinara. The result is a lighter, yet still decadent, version that keeps the vegetarian spirit alive.
Cheese‑Only Extravaganza
Omit the sauce entirely and fill the shells with a triple‑cheese blend. Bake until the top is golden and the cheese is bubbling—this version is pure comfort for cheese lovers.
Gourmet Truffle Twist
Stir a teaspoon of truffle oil into the marinara before pouring it over the shells. Finish with a drizzle of truffle oil after baking for an earthy, luxurious aroma that elevates the dish.
Gluten‑Free Adaptation
Use gluten‑free manicotti shells and a gluten‑free marinara sauce. The texture remains the same, and the flavors stay deliciously familiar.
Storing and Bringing It Back to Life
Fridge Storage
Cool the baked dish completely, then cover tightly with plastic wrap or foil. Store in the refrigerator for up to 3 days. The cheese will firm up slightly, but the flavors remain robust.
Freezer Friendly
Wrap the dish in parchment paper and then in foil before freezing. It will keep for up to 2 months. When ready, thaw in the refrigerator overnight and bake at 375°F for 20 minutes, or until heated through.
Best Reheating Method
Reheat in a preheated oven at 350°F for 10–12 minutes. Add a splash of water to the bottom of the dish before covering with foil to keep the pasta from drying out. The cheese will melt again, and the sauce will steam to perfection.