I was standing in my kitchen, the clock ticking, the oven humming, and a sudden craving for something silky, tropical, and utterly indulgent hit me like a rogue wave. I tried the classic vanilla panna cotta, but it felt like a plain white canvas when I needed a splash of island sunshine. Then, in a moment of reckless inspiration, I grabbed the nearest can of coconut milk and thought, “What if I marry coconut with vanilla in a panna cotta?” The result? A dessert so luscious it practically sings “Aloha!” every time you take a bite. I dare you to taste this and not go back for seconds.
Picture this: the kitchen air thick with the sweet perfume of vanilla beans, the gentle hiss of the saucepan as the cream and coconut milk mingle, and a faint caramelized note that whispers of hidden caramelization. The texture? Imagine a cloud that’s been brushed with silk—smooth, firm enough to hold its shape, yet yielding like a whisper when your spoon slides through. The taste is a perfect balance: the coconut’s buttery richness dances with the pure, aromatic vanilla, while a whisper of sugar adds just enough sparkle. I’ll be honest — I ate half the batch before anyone else got to try it, and that’s saying something because this version is hands down the best you’ll ever make at home.
Most recipes get this completely wrong. They either drown the delicate vanilla in a sea of coconut, or they forget the essential gelatin step, leaving you with a watery disappointment. Here’s what actually works: a precise gelatin bloom, a gentle simmer that coaxes the flavors together without scorching, and a quick chill that sets the dessert into a flawless, glossy finish. I’ve added a tiny twist—a pinch of salt that brightens the sweetness and a splash of cold water to keep the gelatin from clumping. This secret step is the game-changer that turns a good panna cotta into a legendary one.
Now, let’s walk through every single step — by the end, you’ll wonder how you ever made it any other way. Okay, ready for the game-changer? Grab your whisk, your favorite ramekins, and let’s dive into the pure, tropical magic that is Coconut Vanilla Panna Cotta. Stay with me here — this is worth it.
What Makes This Version Stand Out
- Flavor Fusion: The coconut milk adds a buttery, tropical depth that pairs perfectly with the warm, aromatic vanilla, creating a flavor profile that feels both familiar and exotic.
- Silky Texture: By gently heating the cream and coconut milk together and using the perfect amount of gelatin, you achieve a custard‑like firmness that melts on the tongue.
- Simplicity: Only seven ingredients, all pantry staples, mean you can whip this up on a weeknight without a trip to the specialty store.
- Unique Twist: A pinch of salt and a splash of cold water keep the gelatin smooth and the sweetness balanced, a detail most recipes overlook.
- Crowd Reaction: Guests often ask for the recipe after the first bite, and the “wow” factor is guaranteed—especially when you serve it with fresh berries or toasted coconut.
- Make‑Ahead Magic: This dessert can be prepared up to two days in advance, making it a perfect make‑ahead for parties or dinner parties.
- Ingredient Quality: Using full‑fat coconut milk and heavy cream ensures a rich mouthfeel that low‑fat alternatives simply can’t match.
- Cooking Method: The gentle simmer and careful gelatin bloom prevent grainy texture, delivering a flawless, glossy finish every time.
Inside the Ingredient List
The Flavor Base
First up, the coconut milk. I recommend using a can of full‑fat coconut milk—look for the kind that separates into a creamy layer on top and a watery layer at the bottom. The creamy layer is where the magic lives; it adds a buttery richness that milk alone can’t provide. If you skim the top and miss it, the panna cotta will taste watery and lack that tropical punch. For a dairy‑free version, you could swap the heavy cream for an equal part of coconut cream, but you’ll lose a bit of the luxurious mouthfeel.
Next, the heavy cream. This is the secret weapon that gives the panna cotta its silk‑smooth texture. Heavy cream’s high fat content coats each molecule of gelatin, preventing it from forming a rubbery network. If you’re watching calories, you can substitute half‑and‑half, but expect a slightly less creamy result. When I first tried using low‑fat milk, the dessert turned out grainy—don’t make that mistake.
The Sweetness Crew
Granulated sugar is the sweetener that lets the coconut and vanilla shine without overpowering them. I use a half cup, which is enough to balance the natural sweetness of the coconut while allowing the vanilla’s floral notes to come through. If you prefer a less sweet dessert, you can reduce it to one‑third cup, but keep in mind that the gelatin needs a bit of sugar to dissolve evenly.
Vanilla extract is the star of the show. A single tablespoon of pure vanilla extract adds a warm, aromatic depth that makes the palate feel like it’s on a tropical vacation. I always opt for a high‑quality extract—nothing artificial, just pure vanilla beans steeped in alcohol. If you have vanilla beans on hand, split one and scrape the seeds into the mixture for an even more intense flavor.
The Setting Squad
Gelatin is the unsung hero that transforms a liquid into a firm, sliceable dessert. One packet (about 2 ¼ teaspoons) of unflavored gelatin is just right for a four‑serving batch. The key is to bloom it in cold water first; this hydrates the granules and prevents clumping when you add it to the hot mixture. Skipping the bloom step results in a gritty texture that no one wants.
A pinch of salt may seem trivial, but it’s a flavor amplifier. Salt cuts through the sweetness, rounds out the coconut’s richness, and makes the vanilla pop. Think of it as the conductor that brings all the flavors together in perfect harmony.
Everything's prepped? Good. Let's get into the real action...

The Method — Step by Step
Start by blooming the gelatin. Pour 3 tablespoons of cold water into a small bowl, sprinkle the packet of gelatin over the surface, and let it sit undisturbed for 5 minutes. This step is crucial; the gelatin will swell into a fluffy, translucent cloud. Watch the texture change—it should feel like a soft gel, not a clumpy mess.
Kitchen Hack: If you’re in a rush, you can gently warm the water (not hot) to speed up blooming; just be careful not to dissolve the gelatin prematurely.In a medium saucepan, combine 1 cup coconut milk, 1 cup heavy cream, ½ cup granulated sugar, and a pinch of salt. Place the pan over medium heat and stir constantly with a wooden spoon. The mixture should begin to steam, releasing a fragrant aroma that smells like a tropical breeze. Keep the heat moderate; you want a gentle simmer, not a rolling boil, which could scorch the coconut milk and create a burnt flavor. Listen for the soft bubble—that’s the sweet spot.
Once the sugar has fully dissolved and the liquid is shimmering, remove the pan from the heat. At this point, stir in 1 tablespoon of vanilla extract. The vanilla will instantly fill the kitchen with its warm, sweet perfume, and you’ll notice the liquid taking on a slightly richer hue. This is the moment where the flavor base truly comes alive.
Watch Out: If you add the gelatin to a boiling liquid, it will clump and become grainy. To avoid this, let the coconut‑cream mixture cool for about 2 minutes—just enough that it’s still warm but not scalding. Then, whisk the bloomed gelatin into the mixture until it disappears completely. You’ll see the liquid turn glossy and slightly thicker, a sign that the gelatin is fully incorporated.
Now comes the chilling phase. Place a fine‑mesh strainer over a large bowl or jug and pour the mixture through it. This step removes any tiny lumps or undissolved gelatin, ensuring a perfectly smooth texture. As the liquid streams, you’ll hear a gentle, soothing sound—like a quiet waterfall—that signals you’re on the right track.
Divide the strained mixture evenly among four (or six) ramekins or small glasses. I like to use a ladle for precision, but a measuring cup works just as well. The liquid should fill each vessel about three‑quarters full, leaving room for a garnish later.
Kitchen Hack: For a flawless surface, tap each ramekin gently on the counter to release any air bubbles that might have formed during pouring.Cover each ramekin with plastic wrap, making sure the wrap touches the surface of the panna cotta. This prevents a skin from forming as it sets. Place the ramekins on a baking sheet (for easy transport) and slide them into the refrigerator. Chill for at least 4 hours, but overnight is ideal. During this time, the gelatin will set, creating that coveted wobble when you gently jiggle the dish.
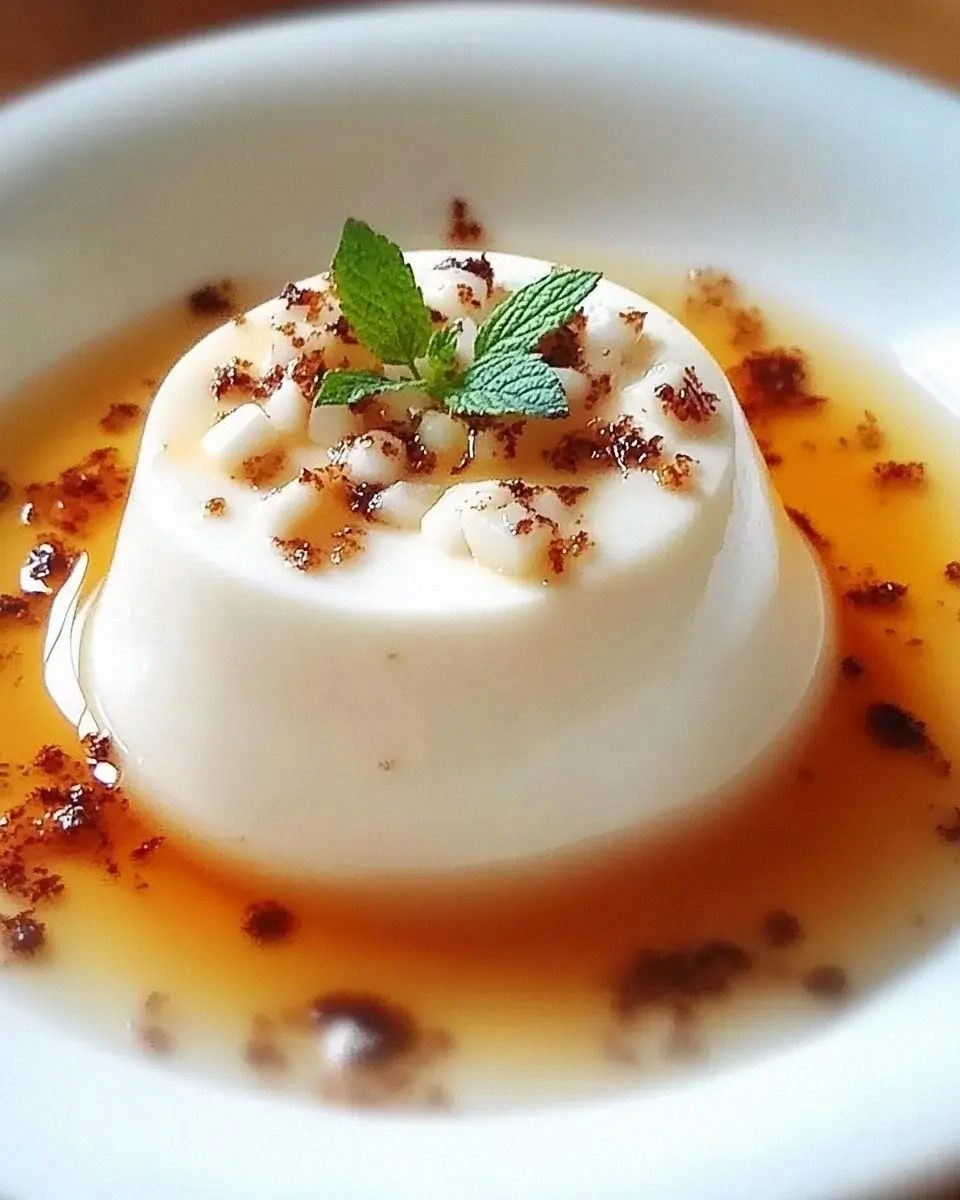
When you’re ready to serve, remove the plastic wrap and give each panna cotta a quick visual check. The surface should be glossy and firm to the touch, with a slight give when pressed with a fingertip. If you like a bit of texture contrast, sprinkle toasted coconut flakes, fresh berries, or a drizzle of mango puree on top. The contrast of the cool, creamy base with the bright, tangy fruit is pure bliss.
Finally, present the panna cotta on a simple white plate or a wooden board. The visual simplicity lets the colors of your garnish shine. Take a moment to admire the glossy surface—then dive in. That first spoonful should feel like a silky wave, with the coconut and vanilla dancing together in perfect harmony. That’s it — you did it. But hold on, I've got a few more tricks that'll take this to another level...
Insider Tricks for Flawless Results
The Temperature Rule Nobody Follows
Never pour gelatin into a boiling liquid. The heat can denature the protein, causing a grainy texture that no amount of whisking can fix. Instead, aim for a temperature of around 120°F (49°C) before adding the gelatin. This is warm enough to dissolve the gelatin smoothly but cool enough to preserve its setting power. I once tried adding gelatin to a scorching mixture and ended up with a lumpy disaster—trust me, that was a hard lesson.
Why Your Nose Knows Best
Your sense of smell is a reliable indicator of when the cream mixture is ready. As soon as you detect a faint caramel note and the sweet vanilla aroma, you’re at the perfect point. If the scent is still raw or milky, keep simmering for another minute. This sensory checkpoint saves you from under‑cooking (resulting in a loose set) or over‑cooking (resulting in a cooked‑gelatin taste).
The 5‑Minute Rest That Changes Everything
After whisking the gelatin into the warm mixture, let the combined liquid sit for five minutes before straining. This brief rest allows any tiny air bubbles to rise and the gelatin to fully integrate, giving you a smoother final texture. Skipping this pause often leads to a slightly cloudy surface—nothing catastrophic, but it does take away that professional shine.
The Garnish Game
A garnish isn’t just for looks; it adds a textural contrast that elevates the whole experience. Toasted coconut adds a nutty crunch, while a drizzle of passion‑fruit coulis brings acidity that cuts through the richness. I love pairing it with a few fresh mint leaves for a pop of color and a hint of herbal freshness. Experiment—your palate will thank you.
The Chill‑Then‑Serve Secret
Even after the panna cotta is set, give it a quick 10‑minute sit at room temperature before serving. This slight warming softens the edges just enough to make the spoon glide effortlessly, while the center stays firm. It’s a subtle trick that makes the dessert feel less “cold” and more “inviting.”
Creative Twists and Variations
This recipe is a playground. Here are some of my favorite ways to switch things up:
Mango‑Lime Sunrise
Blend fresh mango puree with a splash of lime juice and fold it into the cooled mixture before chilling. The bright citrus cuts through the coconut, creating a sunrise on the palate that’s perfect for summer brunches.
Chocolate Coconut Dream
Add 2 tablespoons of high‑quality cocoa powder to the coconut‑cream base and increase the sugar by a tablespoon. The result is a deep, chocolatey panna cotta with a subtle coconut undertone—ideal for chocolate lovers who still want a tropical twist.
Spiced Chai Infusion
Steep a chai tea bag (or a blend of cinnamon, cardamom, and cloves) in the warm coconut‑cream mixture for 5 minutes, then strain. This gives the panna cotta a warm, spicy aroma that’s perfect for cozy evenings.
Berry‑Burst Layer
After pouring the base into the ramekins, add a thin layer of raspberry coulis, then gently swirl with a skewer. As it sets, the coulis creates a beautiful marbled effect and a burst of tartness that balances the sweet coconut.
Nutty Crunch Top
Toast a mixture of sliced almonds, coconut flakes, and a pinch of brown sugar. Sprinkle generously over the set panna cotta just before serving for an added crunch that contrasts the silky interior.
Storing and Bringing It Back to Life
Fridge Storage
Cover each ramekin tightly with plastic wrap and store in the refrigerator for up to 3 days. The gelatin keeps the panna cotta firm, and the flavors continue to meld, becoming even more harmonious over time.
Freezer Friendly
If you need to keep it longer, freeze the panna cotta (still covered) for up to 1 month. Thaw gently in the fridge overnight before serving. Adding a tiny splash of coconut milk during the thaw helps restore the original silkiness.
Best Reheating Method
Panna cotta is best served cold, but if you prefer a slightly warmer dessert, place the ramekin in a warm water bath for 2‑3 minutes. Add a teaspoon of water or coconut milk before the brief warm‑up; the steam will revive the creamy texture without melting the set gelatin.