You know that moment when you’re halfway through a weeknight dinner, the fridge is a barren wasteland, and the clock is mercilessly ticking toward dinner time? That was me last Friday, standing in a kitchen that smelled faintly of burnt toast and hope. I had a can of black beans, an onion that had seen better days, and a stubborn chipotle pepper that had a personality all its own. I stared at the empty plate, the silence of the kitchen louder than any sound. Then, a thought sparked—why not turn this humble pantry lineup into a fiesta of flavor? I decided to give these black beans a crispy twist, and the rest of this post is the recipe that turned that desperate dinner into a crowd‑pleasing masterpiece.
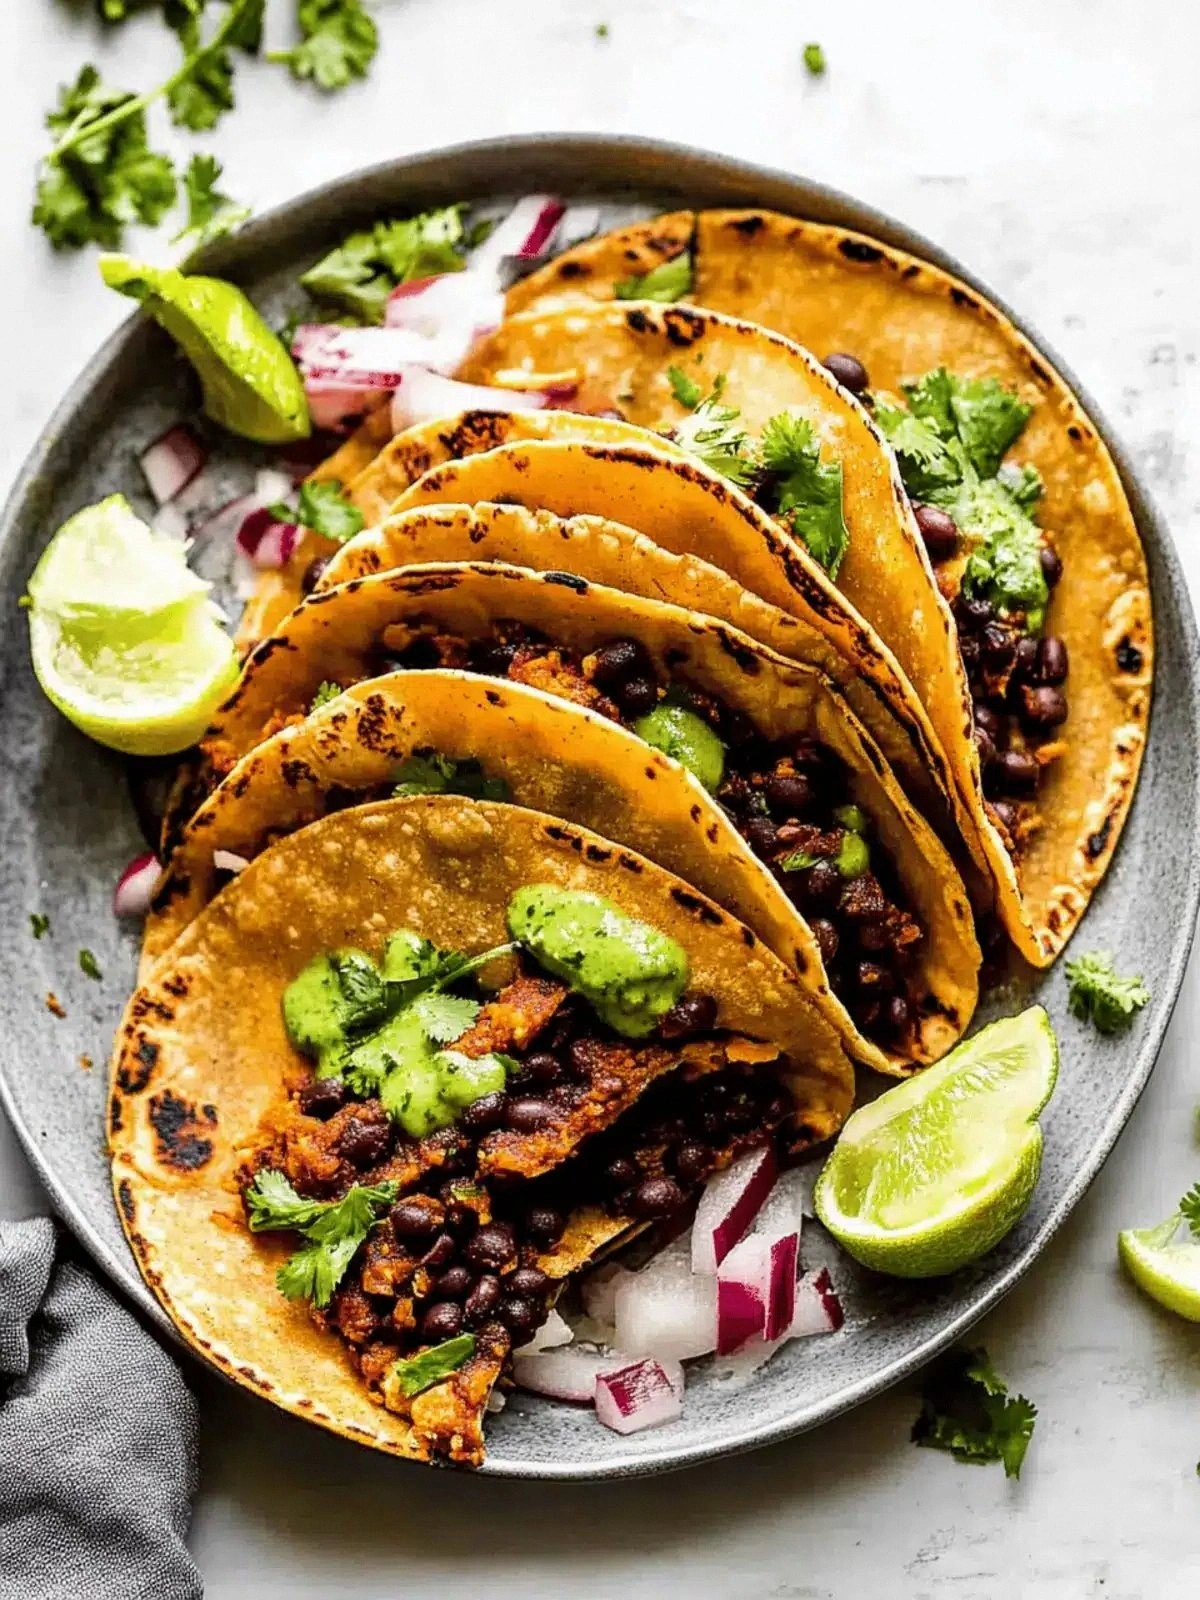
Picture this: a sizzling pan, the aroma of cumin and smoked paprika rising like a promise, and the sound of beans popping with a gentle pop as they hit hot oil. The visual is a golden crust forming on each bean, the edges crisping like the crack of a freshly cut tortilla. When you take a bite, the beans burst with a smoky heat, the chipotle adding a whisper of heat that lingers like a secret. The cheese melts into a silky ribbon that coats the beans, while the tortillas add a satisfying crunch that breaks the silence of the first bite. The result? A dish that feels like a hug in a tortilla, a warm embrace that makes the rest of the evening feel less rushed and more indulgent.
What makes this version stand out is not just the crunch or the smoky heat; it’s the deliberate layering of textures and flavors that play against each other. I’ve perfected a method that turns ordinary canned beans into a star that sings. The secret sauce is a blend of tomato paste and vegetable stock that thickens the beans into a silky base, then a quick sear that gives them a caramelized edge. I’ve also discovered that a touch of cheese—pepper jack in this case—adds a creamy counterpoint that balances the chipotle’s bite. And the best part? It’s ridiculously simple, so you can whip it up in under 30 minutes, making it the ultimate weeknight treat.
But before you grab your skillet, let’s dive into the details that make this recipe a game‑changer. I’ll walk you through every single step—how to prep the beans, how to get that perfect crisp, how to assemble the tacos, and why each ingredient matters. By the end, you’ll wonder how you ever made tacos any other way. And trust me, once you try this, I dare you to taste it and not go back for seconds.
What Makes This Version Stand Out
- Flavor: The chipotle pepper adds a smoky, earthy heat that cuts through the earthiness of the beans, creating a layered flavor profile that is both bold and balanced.
- Texture: The quick sear on the beans produces a caramelized crust that gives the dish a delightful crunch, while the cheese melts into a velvety coating.
- Ease: No special equipment, no long prep times—just a skillet, a can of beans, and a few pantry staples.
- Versatility: The base can be adapted to vegan, keto, or low‑calorie versions by swapping the cheese and tortillas.
- Crowd‑pleaser: The combination of smoky, spicy, and creamy flavors appeals to both adventurous eaters and comfort‑food lovers alike.
- Ingredient Quality: Using high‑quality canned beans and fresh chipotle peppers in adobo sauce elevates the dish beyond the average bean taco.
- Make‑Ahead Potential: The bean mixture can be prepared in advance and reheated without losing its crispiness, making it perfect for busy weeknights.
- Presentation: The bright green cilantro, the orange zest of the chipotle, and the golden tortillas create a visual feast that’s Instagram‑ready.
Alright, let’s break down exactly what goes into this masterpiece…
Inside the Ingredient List
The Flavor Base
The can of black beans is the heart of this dish. Don’t drain them—leave the liquid in; it becomes part of the sauce that binds everything together. The tomato paste adds depth and a slight sweetness, counterbalancing the smokiness of the chipotle. The vegetable stock is the liquid that turns the paste into a silky sauce, allowing the beans to coat the tortillas without becoming soggy. If you’re craving a richer flavor, substitute the vegetable stock with a splash of low‑fat milk or a non‑dairy alternative.
The onion brings a subtle sweetness when caramelized, and its aroma sets the stage for the rest of the dish. Slice it thinly so it cooks evenly and releases its natural sugars, which caramelize quickly in a hot pan. The garlic adds a sharp, aromatic bite that complements the chipotle’s heat. Mince it finely to ensure it distributes evenly throughout the beans.
The Texture Crew
The chipotle pepper in adobo sauce is the secret weapon that gives this recipe its signature heat. It’s not just the heat—it’s the smoky, earthy undertone that lingers on the palate. If you’re sensitive to heat, you can reduce the chipotle to a quarter of a pepper or replace it with a mild chipotle powder. The corn tortillas add a chewy, slightly sweet base that holds the beans and cheese together. Toasting them lightly before assembly gives them a golden crisp that crunches with each bite.
Cheese is the creamy counterpoint that balances the sharpness of the chipotle. Pepper jack works beautifully because it melts smoothly and carries a mild peppery note. If you’re vegan, try a dairy‑free cheese that melts well, such as a cashew‑based cheese or a vegan cheddar. The cheese also creates a silky coating that prevents the beans from drying out during cooking.
The Unexpected Star
The small splash of vegetable stock is often overlooked, but it’s essential. It creates a sauce that coats the beans, making them juicy and flavorful without becoming mushy. This small amount of liquid also helps the cheese melt into a cohesive blanket over the beans. If you prefer a thicker sauce, you can reduce the stock by half before adding it to the pan.
The Final Flourish
A handful of fresh cilantro, a squeeze of lime, and a sprinkle of crushed tortilla chips are the finishing touches that elevate the dish from simple to sensational. The cilantro adds a bright, herbal note that cuts through the richness, while the lime juice adds a tangy freshness. The crushed tortilla chips add an extra layer of crunch, especially if you like a textural contrast. If you’re aiming for a low‑calorie version, simply omit the chips and use a splash of lime instead.
Everything's prepped? Good. Let's get into the real action…
The Method — Step by Step
- Heat a large skillet over medium‑high heat and add a splash of olive oil. Once the oil shimmers, add the finely minced garlic and sliced onion. Sauté for about 2 minutes until the onion starts to soften, releasing a sweet aroma that signals the base is ready. This is the moment when the kitchen smells like a summer picnic, and you can hear the sizzling promise of flavor. Keep the heat steady to avoid burning the aromatics.
- Add the chipotle pepper, chopped into small pieces, to the skillet. Stir it in with the onion and garlic, letting the heat melt the pepper’s smoky oils into the pan. The pepper should give off a gentle steam, hinting at the heat to come. Be careful not to let it burn; a quick stir every 30 seconds keeps it from scorching. This step is crucial for the depth of flavor.
- Pour in the tomato paste, stirring until it’s fully incorporated and the paste starts to darken slightly, developing a richer color. The paste should coat the onion and garlic like a glossy glaze. This creates a base that’s both sweet and savory, setting the stage for the beans. The aroma at this point should be intoxicating, with hints of caramel and spice.
- Add the can of black beans, including the liquid, to the skillet. Stir everything together so the beans are fully coated in the tomato‑chipotle mixture. The beans should start to sizzle, releasing steam and the savory scent of beans. Allow them to cook for 5 minutes, letting the flavors meld. The beans will thicken slightly, forming a thick, flavorful sauce.
- Pour in the vegetable stock, stirring to combine. The stock will thin the sauce just enough to coat the beans without making them watery. Let the mixture come to a gentle simmer. Watch out—if the liquid boils too vigorously, the beans will break apart, losing their shape and texture. Keep the heat moderate to maintain a steady simmer.
- Reduce the heat to medium and let the beans simmer for 10–12 minutes, stirring occasionally. During this time, the beans will thicken and the flavors will deepen. You’ll notice the sauce becoming glossy and the beans taking on a slightly caramelized edge. This is the moment of truth—if the beans are too wet, let them cook a bit longer; if they’re too dry, add a splash of water.
- While the beans finish cooking, warm the corn tortillas in a dry skillet or microwave for 20–30 seconds. This step makes them pliable and adds a subtle toasted flavor. Once warm, lay them on a clean towel to keep them from drying out. This is where the crunchy texture of the tortilla will contrast with the crispy beans.
- Add the shredded cheese to the bean mixture and stir until it melts into a silky coating. The cheese should coat each bean, creating a creamy layer that balances the chipotle heat. When the cheese melts, it will form a glossy finish that makes the tacos look irresistible. The final touch is to sprinkle fresh cilantro and a squeeze of lime over the assembled tacos for brightness.
That’s it— you did it. But hold on, I’ve got a few more tricks that’ll take this to another level…
Insider Tricks for Flawless Results
The Temperature Rule Nobody Follows
Many cooks underestimate the importance of heat control during the bean searing phase. Too high a temperature and the beans will burn on the outside while staying raw inside. Too low and you’ll lose that coveted caramelized crust. I recommend setting your skillet to medium‑high and letting it heat up for a minute before adding oil. Then, add the beans in a single layer, allowing them to sear for 2–3 minutes before stirring. This technique ensures a uniform crust and a tender interior.
Why Your Nose Knows Best
Your sense of smell is a reliable indicator of doneness. As the beans cook, you’ll notice a change from a raw, beany scent to a rich, toasted aroma. When the beans start to release a nutty, caramelized scent, it’s time to move on to the next step. If the aroma is still raw or the beans emit a faint metallic smell, give them a bit more time. Trust your nose—it’s your best sous‑chef.
The 5‑Minute Rest That Changes Everything
After removing the skillet from heat, let the beans rest for 5 minutes with the lid on. This resting period allows the steam to continue cooking the beans, ensuring they’re perfectly tender. It also lets the flavors meld, creating a deeper, more harmonious taste. If you’re in a rush, you can skip the rest, but you’ll miss out on the subtle flavor development.
Cheese: The Secret to Creamy Perfection
Choosing the right cheese is vital. Pepper jack melts beautifully and adds a mild peppery flavor that complements the chipotle. If you prefer a milder taste, mozzarella works well, but it won’t add the same depth. For a vegan version, use a cheese that melts smoothly, such as a cashew‑based cheese. The key is to add the cheese at the right moment—after the beans have thickened—to avoid separation.
Tortilla Warmth Matters
Warm tortillas hold the beans better and provide a contrast of textures. If you skip the warming step, the tortillas will be brittle and the beans may slide off. To warm them, simply place them on a dry skillet for 10–15 seconds per side or wrap them in a damp paper towel and microwave for 20 seconds. This small step elevates the overall eating experience.
The Final Touch: Fresh Herbs and Citrus
Adding fresh cilantro and lime after assembly brightens the dish and balances the richness. The citrus acidity cuts through the cheese’s creaminess, while the cilantro adds a burst of herbal freshness. If you’re not a fan of cilantro, try fresh mint or parsley for a different flavor profile. The key is to add these ingredients right before serving to preserve their vibrant flavors.
Creative Twists and Variations
This recipe is a playground. Here are some of my favorite ways to switch things up:
Spicy Avocado Smash
Swap the cheese for a creamy avocado smash. Blend ripe avocado with lime juice, salt, and a pinch of cumin until smooth. Spread it on the tortilla before adding the beans. The avocado adds a cool, buttery texture that balances the chipotle heat. This variation is perfect for those who love a creamy, low‑fat option.
Keto Crunch
Use low‑carb tortillas made from almond flour or coconut flour. Keep the cheese and beans as is, but add a sprinkle of crushed pork rinds on top for an extra crunch. This keto version keeps the flavor profile intact while cutting carbs dramatically. It’s ideal for those who want a high‑protein, low‑carb meal.
Vegan Delight
Replace the cheese with a vegan cheese that melts well, such as a cashew‑based cheese or a vegan cheddar. Add a splash of nutritional yeast for an extra cheesy flavor. The beans remain the star, and the vegan cheese provides the creamy coating. This version is plant‑based, dairy‑free, and still incredibly satisfying.
Mediterranean Twist
Add diced sun‑dried tomatoes and a pinch of oregano to the bean mixture. Swap the corn tortillas for pita pockets to give it a Mediterranean vibe. The sun‑dried tomatoes bring a sweet, tangy note that pairs beautifully with the smoky chipotle. This variation offers a unique flavor profile that will surprise your taste buds.
Breakfast Boost
Serve the tacos over a bed of scrambled eggs or a fried egg on top. Add a sprinkle of chorizo or bacon for extra protein. The eggs add a rich, savory element that transforms the dish into a hearty breakfast. This variation is perfect for lazy weekend mornings.
Storing and Bringing It Back to Life
Fridge Storage
Store the cooked bean mixture in an airtight container for up to 4 days in the refrigerator. Keep the tortillas separately in a sealed bag to maintain crispness. When ready to serve, reheat the beans in a skillet over medium heat until warmed through, then assemble the tacos fresh. The cheese will re‑melt, and the tortillas will regain their warm, pliable texture.
Freezer Friendly
The bean mixture freezes well for up to 3 months. Portion into individual servings and store in freezer bags. Thaw overnight in the refrigerator before reheating. Warm the tortillas on a skillet or microwave, then assemble the tacos. This method saves time on busy nights while preserving flavor.
Best Reheating Method
When reheating, add a tiny splash of water to the bean mixture to prevent it from drying out. Cover the skillet with a lid to trap steam, and stir occasionally. The water will create a gentle steam that keeps the beans moist and the cheese creamy. Reheat over low to medium heat until the beans are steaming hot. This technique ensures a fresh, restaurant‑quality experience every time.