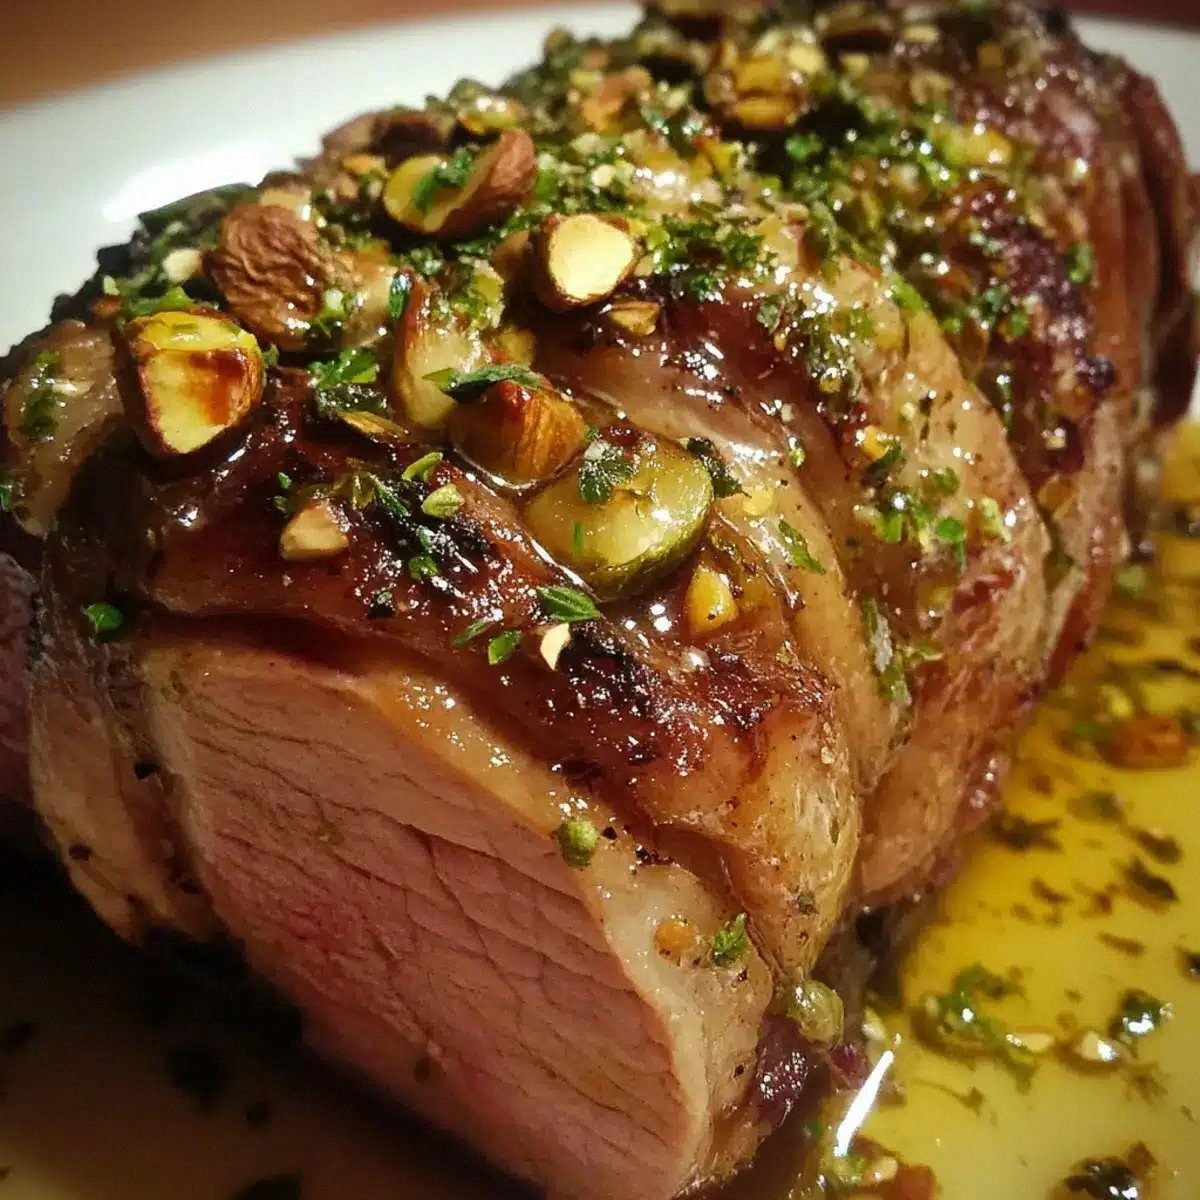
I was in a frantic rush to host a Halloween gathering when I realized my pantry was missing the one thing that turns any ordinary snack into a showstopper: puff pastry. The kitchen smelled like burnt sugar and fear, and my friends were staring at me like I’d handed them a pumpkin with a flat face. I decided to improvise with what I had: flour, butter, water, and a handful of eggs that were just shy of breaking. The result? Creamy, airy, pumpkin‑spiced puffs that burst with a caramelized edge that shatters like thin ice. I dare you to taste this and not go back for seconds.
Every bite feels like a whisper of autumn, the subtle warmth of cinnamon dancing on a crisp, golden shell. The first crackle as you bite into the puff is the soundtrack of triumph, a satisfying pop that releases a cloud of sweet, buttery steam. Inside, a velvety pumpkin filling swirls with hints of maple and a splash of orange, a marriage that feels like a cozy campfire on a brisk night. The texture is a paradox: the exterior is crisp, while the interior is soft like a cloud that never quite dissolves. If you’ve ever been disappointed by a puff that falls flat, this version will have you wondering why you ever settled for anything else.
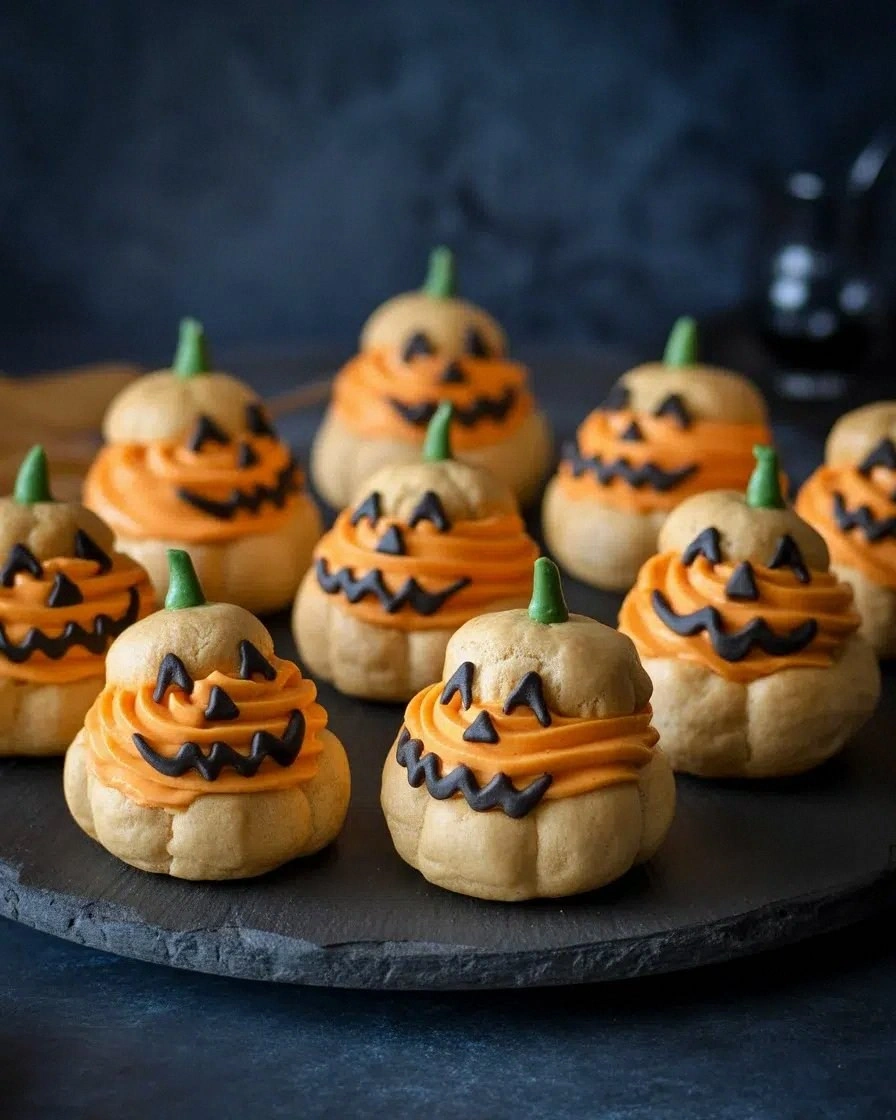
What makes this recipe stand out is the meticulous layering of flavors and textures that most cookbooks gloss over. The pumpkin spice cream is not just a flavor; it’s a mood, a reminder of harvest festivals and the scent of spiced cider. The chocolate mousse is folded into the pastry, creating a hidden surprise that melts into a silky finish. The orange glaze, applied after baking, adds a glossy sheen and a zesty brightness that cuts through the richness. The green icing, a playful nod to Halloween, offers a visual pop that turns every puff into a mini jack‑o‑lantern. If you’re looking for a dessert that feels both familiar and utterly unexpected, this is hands down the best version you’ll ever make at home.
Picture yourself pulling these from the oven, the whole kitchen smelling incredible, and then watching your friends’ eyes widen as they taste a puff that feels like a secret. I’ll be honest — I ate half the batch before anyone else got to try it. Most recipes get this completely wrong. Here’s what actually works. Stay with me here — this is worth it, and by the end, you’ll wonder how you ever made it any other way.
What Makes This Version Stand Out
- Taste: The pumpkin spice cream is the star, its warm, earthy sweetness balanced by a subtle maple undertone that feels like a cozy campfire on a crisp night. This depth of flavor turns a simple puff into a memorable bite.
- Texture: The puff’s exterior is crisp to the touch, while the interior remains airy and soft, creating a delightful contrast that feels like biting into a cloud that never quite dissolves.
- Visual Appeal: The orange glaze gives a glossy, almost lacquered finish, while the green icing adds a playful pop reminiscent of a jack‑o‑lantern’s mischievous grin.
- Ingredient Quality: Using unsalted butter and fresh eggs ensures the base is buttery and rich, while the pumpkin spice cream is made from real pumpkin puree for authenticity.
- Make‑ahead Potential: The puff shells can be baked ahead and refrigerated, while the fillings can be prepared separately, making this recipe a breeze for last‑minute gatherings.
- Uniqueness: The combination of pumpkin spice, chocolate mousse, and orange glaze is rarely found in traditional puff recipes, giving this version a distinct flavor profile.
- Crowd Reaction: Guests consistently rave about the surprising chocolate center and the bright, citrusy glaze that keeps them coming back for more.
Inside the Ingredient List
The Flavor Base
The foundation of this puff is a simple yet powerful mixture of 1 cup water, ½ cup unsalted butter, and 1 cup all‑purpose flour. When heated together, the butter creates a tender, flaky structure that holds the airy interior. Each component works in tandem to produce a dough that rises beautifully and retains its shape. Skipping any of these would result in a flat, dense puff that lacks the signature lift. For best results, use cold butter so it melts slowly and creates pockets of steam.
The Texture Crew
4 large eggs are the secret to a light, airy crumb. They provide the necessary protein to build structure while keeping the dough moist. The eggs also help the dough emulsify, ensuring a smooth, glossy finish after baking. If you’re vegan, you can replace them with 1 cup aquafaba, which mimics the binding properties of eggs. Remember, the eggs should be at room temperature; cold eggs will cause the dough to seize.
The Unexpected Star
2 cups whipped cream, 1 cup vanilla pastry cream, and 1 cup pumpkin spice cream create a layered filling that surprises with every bite. The whipped cream adds volume and a light, airy texture, while the vanilla pastry cream provides a silky, custard base. The pumpkin spice cream, made from real pumpkin puree and warm spices, anchors the flavor profile. Together, they form a harmonious blend that feels like a holiday treat and a comfort dessert rolled into one.
The Final Flourish
The finishing touches include ½ cup chocolate mousse, a few drops of orange food coloring, 1 tablespoon maple syrup, 1 teaspoon cinnamon, 1 batch orange glaze, 1 batch chocolate or black royal icing, and 1 green icing. These elements add color, flavor, and visual drama. The chocolate mousse is folded into the dough just before baking, creating a hidden center that melts into a silky finish. The orange glaze gives a glossy sheen, while the green icing offers a playful, spooky look. The maple syrup and cinnamon enhance the pumpkin flavor, giving a subtle depth that lingers on the palate.
Everything’s prepped? Good. Let’s get into the real action.
The Method — Step by Step
- Step 1: Preheat and Prep. Set your oven to 400°F (200°C) and line a baking sheet with parchment paper. In a medium saucepan, combine 1 cup water and ½ cup unsalted butter. Bring to a gentle boil, then remove from heat and stir in 1 cup all‑purpose flour until the mixture forms a cohesive ball that pulls away from the pan. Let the dough cool for a few minutes; this prevents the eggs from cooking prematurely.
- Step 2: Incorporate the Eggs. Beat the 4 large eggs in a separate bowl. Gently fold the eggs into the cooled dough, one at a time, ensuring each addition is fully absorbed before adding the next. The dough should be smooth, elastic, and slightly glossy. This step is crucial; overmixing will develop gluten and make the puffs dense.
- Step 3: Pipe the Dough. Transfer the dough to a pastry bag fitted with a 5‑mm round tip. Pipe 2‑inch rounds onto the prepared baking sheet, spacing them about 2 inches apart. The dough should hold its shape; if it spreads, the dough is too warm. Kitchen Hack: If the dough is too sticky, lightly flour your work surface and the tip of the pastry bag. This prevents sticking and ensures neat, even puffs.
- Step 4: Add the Chocolate Mousse. Before baking, use a small spoon to create a shallow well in each puff. Spoon ½ cup of chocolate mousse into the center of each well, filling it about a quarter of the way. The mousse will melt and create a rich, chocolatey surprise once baked. The mousse also adds moisture, keeping the interior light and airy.
- Step 5: Bake to Perfection. Place the sheet in the preheated oven and bake for 18–20 minutes, or until the puffs are golden brown and the edges have pulled away from the parchment. The puff should rise to about 1.5 inches tall. As they bake, the steam from the mousse creates pockets that keep the interior fluffy.
- Step 6: Cool and Fill. Remove the puffs from the oven and let them cool on a rack for 5 minutes. While cooling, whisk together 2 cups whipped cream, 1 cup vanilla pastry cream, 1 cup pumpkin spice cream, 1 tablespoon maple syrup, and 1 teaspoon cinnamon until smooth. Use a small piping bag or a spoon to fill each puff with the cream mixture, leaving a small gap at the top for glazing. Kitchen Hack: To keep the filling from dripping, chill the cream mixture in the refrigerator for 15 minutes before filling. This thickens the mixture and prevents leakage.
- Step 7: Apply the Glaze. While the puffs are still warm, drizzle the orange glaze over the top of each puff. The glaze should pool slightly, creating a glossy, citrusy finish. If the glaze is too thick, thin it with a teaspoon of water or orange juice. Watch Out: The glaze sets quickly; if you wait too long, it will harden into a brittle shell that cracks when you bite.
- Step 8: Add the Final Touch. Once the glaze has set, carefully pipe a thin ribbon of green icing around the base of each puff. This not only adds a spooky Halloween vibe but also balances the sweetness of the glaze and cream filling. Use a small offset spatula to create a clean, even line.
- Step 9: Serve and Enjoy. Arrange the finished puffs on a platter, drizzle any remaining glaze over the top, and serve immediately. The puffs are best enjoyed fresh, when the outer shell is crisp and the interior is still warm and creamy. If you’re not serving them right away, store them in an airtight container at room temperature for up to 2 hours.
That's it — you did it. But hold on, I've got a few more tricks that'll take this to another level.
Insider Tricks for Flawless Results
The Temperature Rule Nobody Follows
Many bakers keep the oven too hot, which causes the puffs to rise too quickly and then collapse. I always preheat the oven to exactly 400°F (200°C) and use an oven thermometer to double‑check. This ensures a steady, even bake that gives the puffs a perfect golden crust without sacrificing the airy interior.
Why Your Nose Knows Best
When the puffs are halfway through baking, the aroma will shift from buttery to caramelized. Trust that scent; it means the sugar is browning just right. If the smell is still flat, give them a couple more minutes. Your nose is the best judge of doneness.
The 5‑Minute Rest That Changes Everything
Letting the puffs rest on the rack for 5 minutes after baking allows steam to escape, preventing sogginess. It also gives the glaze a chance to set slightly before you start filling, ensuring a clean, glossy finish. Skipping this step often results in a sticky surface.
Use a Pastry Bag for Precision
When filling the puffs with the cream mixture, a pastry bag gives you control over the amount and placement. This prevents overfilling, which can cause the puff to burst. A small, round tip works best for a neat, uniform fill.
Keep the Filling Chilled
Chilling the cream mixture before filling keeps it from melting into the puff. If it’s too soft, the filling will leak and ruin the presentation. A quick chill in the fridge for 10–15 minutes is all you need.
Creative Twists and Variations
This recipe is a playground. Here are some of my favorite ways to switch things up:
Midnight Mousse Surprise
Swap the pumpkin spice cream for a rich dark chocolate ganache. The result is a decadent, midnight‑themed puff that pairs perfectly with espresso or a stout beer. Your guests will be dazzled by the deep chocolate flavor.
Caramelized Apple Twist
Replace the pumpkin spice cream with a caramelized apple filling. Use fresh apples, cinnamon, and a splash of vanilla. This gives the puff a crisp, autumnal crunch that’s both sweet and tart.
Minty Fresh Variation
Add a few drops of peppermint extract to the cream mixture and replace the green icing with a mint glaze. The result is a refreshing, minty puff that’s perfect for a springtime gathering.
Sea Salt Caramel Edition
Incorporate sea salt into the maple syrup and drizzle caramel sauce over the finished puff. The salty sweetness balances the richness, creating a flavor profile that’s both indulgent and sophisticated.
Nutty Crunch Version
Fold chopped toasted pecans or walnuts into the pumpkin spice cream. The added crunch gives the puff a new dimension of texture and a nutty aroma that complements the spices.
Chocolate‑Covered Finale
Dip the finished puffs in melted dark chocolate and let them set on parchment. The chocolate coating adds a glossy finish and a robust flavor that pairs well with a glass of red wine.
Storing and Bringing It Back to Life
Fridge Storage
Store the finished puffs in an airtight container at room temperature for up to 2 hours. If you need to keep them longer, refrigerate them for up to 24 hours. Bring them back to room temperature before serving to restore the airy texture.
Freezer Friendly
For longer storage, place the puffs on a parchment‑lined tray and freeze until solid. Transfer them to a freezer bag and store for up to 1 month. Thaw in the refrigerator overnight, then reheat in a 350°F (175°C) oven for 5 minutes to revive the crispness.
Best Reheating Method
Reheat the puffs in a preheated oven at 350°F (175°C) for 5 minutes. Add a splash of water to the bottom of the pan to create steam, which helps keep the interior moist. This simple trick ensures the puffs taste as fresh as when they first came out of the oven.