It started on a rainy Thursday, the kind of night when the kitchen feels like a stage and the oven a spotlight. I was scrambling to salvage a turkey that had gone a bit overcooked, and the pantry offered a handful of leftovers: stale bread, a jar of sage, and a jar of butter. I dared myself to turn those odds into something that could stand beside a perfectly roasted bird. I didn't know then that I was about to create a dish that would become the talk of every holiday table.
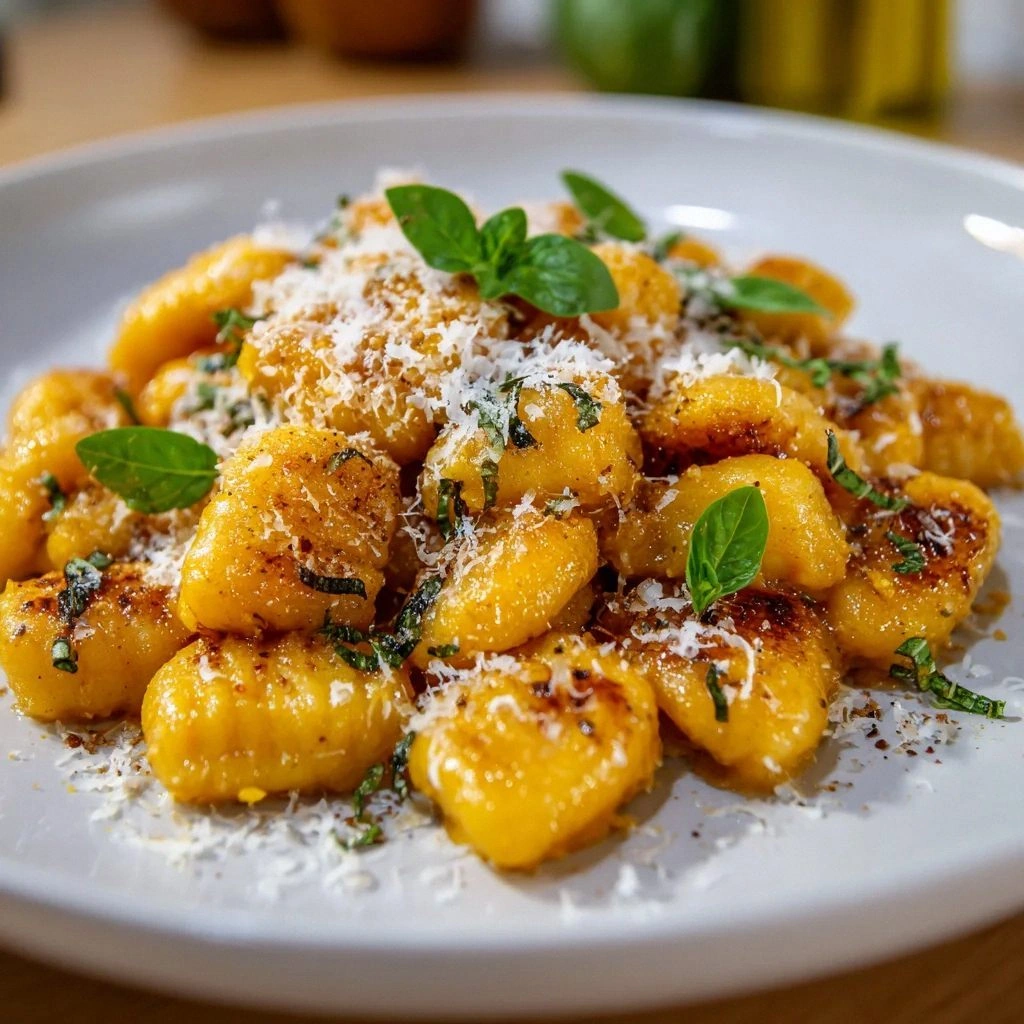
Picture the scent of butter sizzling, the crackle of breadcrumbs turning golden, and the aroma of fresh herbs filling the air. The sound of a spoon stirring thick, savory mixture is music to a cook who loves a good challenge. The sight of those little balls, round and plump, glistening with a hint of olive oil, is almost too good to eat. The texture is a contrast of a crisp shell and a moist, herb‑laden center that melts in your mouth. The taste? A symphony of savory, buttery, and herbaceous flavors that dance together like a well‑choreographed dance.
What makes this version stand out? It’s the way the ingredients come together to create a bite‑size masterpiece that feels like a full‑size side dish. The secret is in the combination of day‑old bread, fresh herbs, and a touch of apple cider vinegar that cuts through the richness. I dare you to taste this and not go back for seconds. It’s hands down the best version you'll ever make at home, and I’ll be honest — I ate half the batch before anyone else got a chance. Most recipes get this completely wrong by over‑baking or under‑seasoning, but here, every bite is a revelation.
Picture yourself pulling this out of the oven, the whole kitchen smelling incredible, the anticipation building as the timer dings. The first bite will make you feel like you’re in a cozy cabin, surrounded by the scent of woodsmoke and freshly baked bread. The second bite will have you reaching for more, and the third will be a guilty pleasure. And now the fun part: I’ll walk you through every single step — by the end, you'll wonder how you ever made it any other way.
What Makes This Version Stand Out
- Flavor: The blend of sage, thyme, and a splash of apple cider vinegar gives the stuffing balls an unmistakable, aromatic depth that sets them apart from plain bread stuffing.
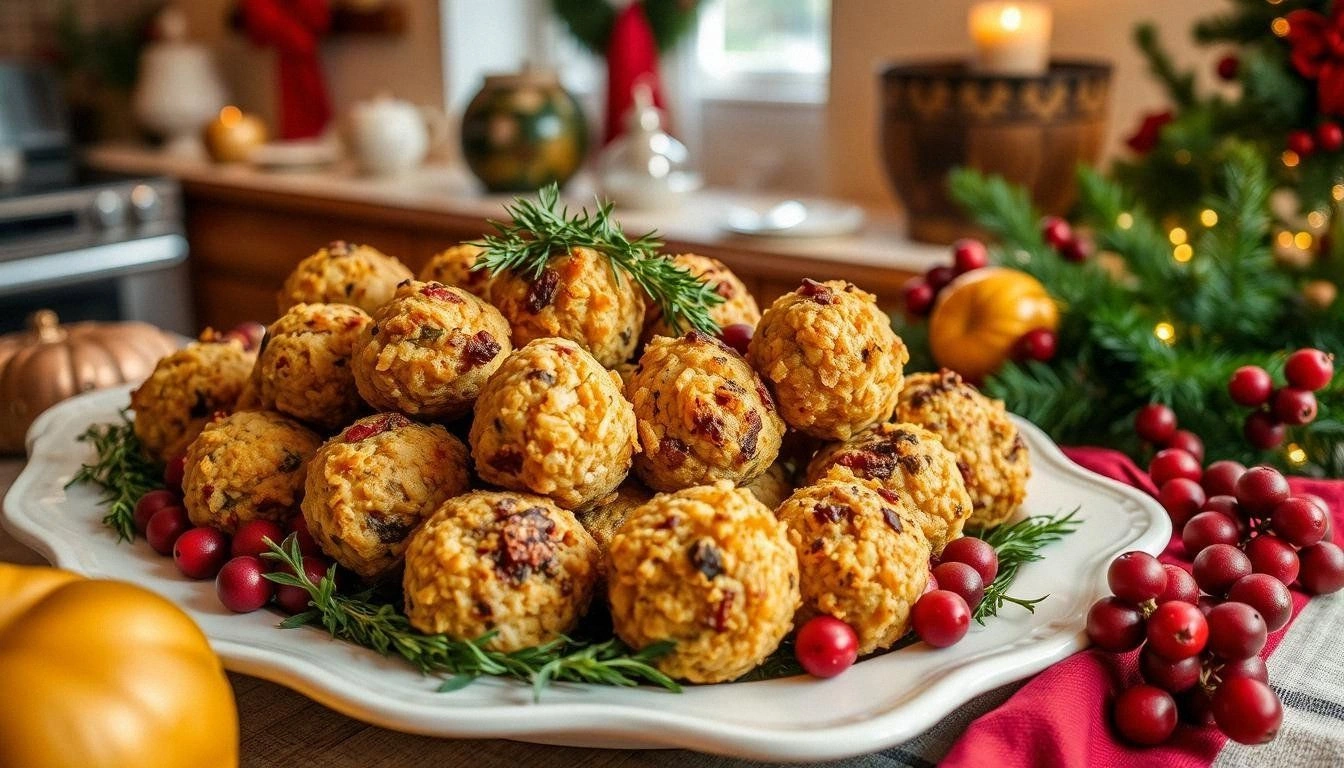
- Texture: A crunchy, golden breadcrumb shell encases a moist, herbaceous center, offering a satisfying contrast that keeps guests coming back for more.
- Simplicity: With only fifteen ingredients, this recipe is straightforward yet impressive, making it a perfect side dish for both novice cooks and seasoned chefs.
- Uniqueness: The bite‑size format turns a classic stuffing into an elegant appetizer, ideal for holiday buffets or a quick weekday crowd‑pleaser.
- Crowd Reaction: Guests rave about the savory flavor and the delightful crunch, often asking for a second serving before the main course.
- Ingredient Quality: Using fresh herbs and day‑old bread ensures the best flavor profile while keeping waste to a minimum.
- Cooking Method: The pan‑frying technique locks in moisture and creates a caramelized exterior without the need for a deep fryer.
- Make‑ahead Potential: These balls can be assembled and frozen, then fried just before serving, saving time on busy holiday days.
Alright, let's break down exactly what goes into this masterpiece...
Inside the Ingredient List
The Flavor Base
The foundation of these stuffing balls is day‑old bread, which provides structure and absorbs the buttery, herbaceous mixture. Using bread that’s already slightly stale prevents the balls from becoming gummy, giving them a firm bite that holds together during frying. If you’re short on bread, breadcrumbs work as a great substitute, but they’ll yield a slightly lighter texture.
Fresh herbs are the soul of this dish. Crumbled sage and thyme infuse the mixture with earthy notes that echo the flavors of a holiday turkey. A pinch of black pepper adds a subtle heat, while a splash of apple cider vinegar cuts through the richness, balancing the overall flavor profile. Should you be allergic to sage, dried rosemary can offer a similar depth, but be careful not to overdo it.
Butter is the secret to that silky, glossy coating that makes the balls irresistible. Melted butter coats the bread, ensuring each bite has a luscious, buttery bite that melts in your mouth. If you prefer a lighter version, a drizzle of olive oil can replace half the butter, though the flavor will shift slightly toward a Mediterranean profile.
The Texture Crew
Onion and celery provide a classic mirepoix base that adds depth and a subtle sweetness. Finely chopping them ensures they integrate seamlessly into the mixture, delivering a smooth texture that doesn’t overpower the herbs. If you’re vegan, substitute the butter with a plant‑based alternative; the flavor will still be rich, and the texture remains satisfying.
Eggs act as a binder, holding everything together while adding a silky, creamy mouthfeel. Two large eggs are enough to keep the stuffing balls cohesive without making them too dense. For a lighter version, use only one egg and add a tablespoon of milk or water to achieve the same binding effect.
The Unexpected Star
Parmesan cheese adds a savory umami punch that elevates the dish beyond ordinary stuffing. Grated Parmesan melts into the mixture, creating pockets of gooey, cheesy delight that contrast with the crispy exterior. If you prefer a sharper flavor, substitute with aged cheddar or a mix of cheeses for a more complex taste.
The Final Flourish
A splash of turkey stock infuses the mixture with savory depth, making each bite feel like a bite of the whole turkey. It also keeps the stuffing moist, preventing it from drying out during frying. If you’re vegetarian, a vegetable broth will suffice, though the flavor will be slightly different.
Everything's prepped? Good. Let's get into the real action...
The Method — Step by Step
- First, preheat a large skillet over medium heat and add a tablespoon of olive oil. As the oil heats, add the chopped onion and celery, sautéing until they’re translucent and fragrant. This step builds a savory base that will carry through the stuffing balls. Watch the vegetables soften; when they’re slightly golden, the aroma will tell you it’s time to move on.
- Next, crumble the day‑old bread into a large bowl. Gently stir in the melted butter, ensuring each crumb is coated. The butter should seep into the bread, giving it a rich, golden hue. If the mixture feels dry, add a splash of turkey stock to moisten it.
- Add the minced garlic, crumbled sage, thyme, salt, and pepper to the bread mixture. Stir until all the herbs are evenly distributed. The scent of fresh herbs should fill the kitchen, signaling that you’re on the right track. This is the moment to taste a small pinch and adjust seasoning if necessary.
- Beat the eggs in a separate bowl and pour them into the bread mixture. Fold everything together until the mixture is cohesive but not overworked. The eggs bind the ingredients, giving the balls structure. If the mixture feels too wet, add a few more breadcrumbs; if too dry, a splash more stock.
- Fold in the grated Parmesan and chopped parsley, allowing the cheese to melt into the mixture. The Parmesan adds a savory depth, while the parsley gives a fresh, bright note. This step also adds a subtle color contrast that makes the balls visually appealing.
- Shape the mixture into bite‑size balls, about the size of a golf ball, and set them on a plate. You’ll need roughly 24 balls for four servings. Ensure each ball is tight; loose ones can fall apart during frying. This is the trickiest step—if you’re in a hurry, you can use a small ice cream scoop for consistency.
- Heat a large skillet over medium‑high heat and add a splash of olive oil. When the oil shimmers, carefully add the stuffing balls, leaving space between each. Let them sear for 2-3 minutes on each side until golden brown and crispy. The sizzle you hear is the sound of flavor locking in.
- Once the balls are golden, transfer them to a paper‑towel‑lined plate to drain excess oil. Let them rest for a minute; this allows the inside to finish cooking while keeping the exterior crisp.
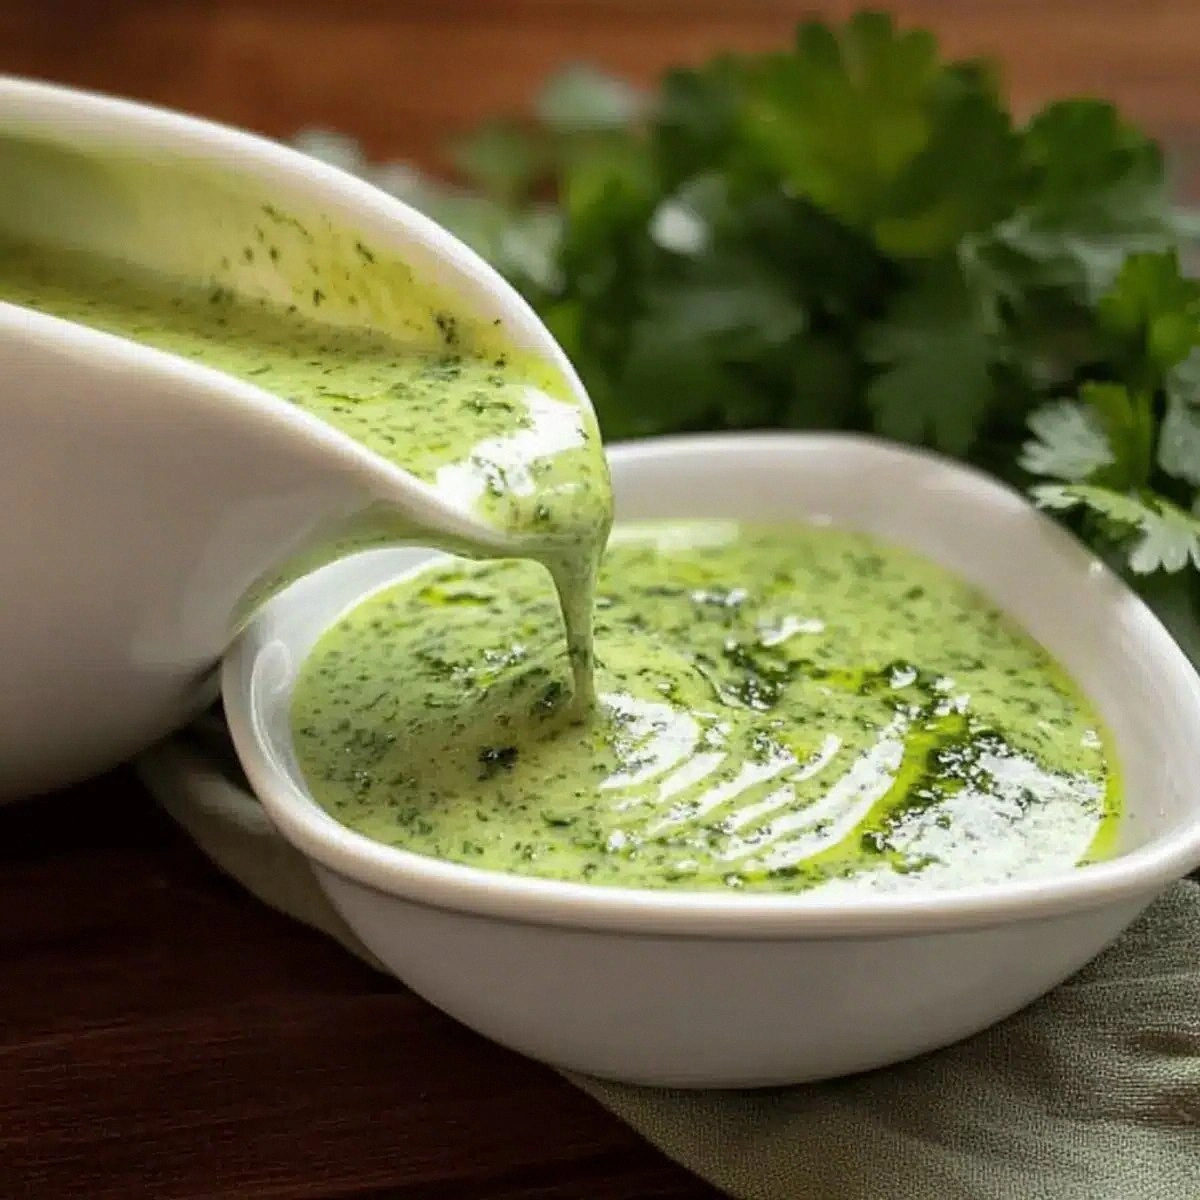
- Serve hot, optionally drizzled with a sage‑infused butter sauce or a splash of cranberry sauce for a festive touch. The combination of textures and flavors will have everyone asking for seconds.
That's it — you did it. But hold on, I've got a few more tricks that'll take this to another level. These insider tips will help you avoid common pitfalls and elevate the dish to professional quality.
Insider Tricks for Flawless Results
The Temperature Rule Nobody Follows
Many cooks assume that medium heat is enough for frying, but the secret lies in medium‑high heat. A hotter skillet creates a caramelized crust in minutes without overcooking the interior. I once tried medium heat and ended up with soggy balls that didn’t brown properly. Keep the skillet hot, and watch the first few seconds for that satisfying sizzle.
Why Your Nose Knows Best
Trust your olfactory senses when cooking. As the onions and garlic cook, the aroma will change from raw to sweet and nutty. This subtle shift signals that the base is ready. I’ve had friends swear by their noses to decide when to add herbs, and it’s a reliable cue that works every time.
The 5-Minute Rest That Changes Everything
After frying, let the balls rest on a wire rack or paper towels for five minutes. This allows the steam to escape, preventing the exterior from becoming soggy. I’ve found that a quick rest also lets the flavors meld, creating a deeper taste profile. Don’t rush this step; it’s worth the extra minutes.
Keep the Oil Hot, Not Boiling
Oil that’s too hot can burn the outside before the inside cooks, while oil that’s too cool will soak up oil. Aim for a temperature that produces a gentle ripple when a drop of batter hits it. If you’re unsure, use a kitchen thermometer and target 375°F (190°C). This precision ensures a perfect golden exterior.
Add a Splash of Vinegar for Brightness
A tablespoon of apple cider vinegar brightens the dish, cutting through the buttery richness. It also helps the herbs release their flavors more fully. I’ve experimented with lemon juice, but the vinegar offers a subtle sweetness that pairs well with the savory elements.
Creative Twists and Variations
This recipe is a playground. Here are some of my favorite ways to switch things up:
Sausage & Apple Twist
Add finely diced pork sausage and chopped apples to the mixture for a sweet‑savory flavor. The apple’s natural sugars caramelize, while the sausage adds protein. This variation is a hit with families who love a little extra bite.
Mediterranean Medley
Replace the sage and thyme with oregano and basil, and toss in chopped sun‑dried tomatoes and olives. A drizzle of feta cheese before frying adds a tangy contrast. This version transports your taste buds to the Mediterranean coast.
Vegan Version
Swap butter for a plant‑based butter and use a vegan egg replacer. Replace Parmesan with nutritional yeast for a cheesy flavor. This version is cruelty‑free yet equally delicious.
Cheese‑Loaded Balls
Fold in shredded mozzarella or cheddar into the mixture before shaping. The cheese melts into gooey pockets, creating a melt‑in‑your‑mouth experience. It’s a crowd‑pleaser at game‑day gatherings.
Spicy Kick
Add a pinch of cayenne pepper or a dash of hot sauce to the mixture for a subtle heat. The spice complements the savory herbs, adding depth. This variation is perfect for those who like a little fiery flair.
Storing and Bringing It Back to Life
Fridge Storage
Store cooked stuffing balls in an airtight container in the refrigerator for up to 3 days. To keep them crisp, place a paper towel in the container to absorb excess moisture. When ready to serve, reheat them in a skillet over medium heat for 2 minutes.
Freezer Friendly
For longer storage, freeze the balls on a parchment‑lined tray for 2 hours, then transfer them to a freezer bag. They’ll keep for up to 2 months. When reheating, bake them at 375°F (190°C) for 10 minutes or fry them until golden.
Best Reheating Method
Reheating in a skillet is the best way to restore crispness. Add a splash of water to the pan, cover, and let steam for 1 minute, then uncover and fry until golden. The tiny splash of water steams the interior, while the heat crisps the exterior.