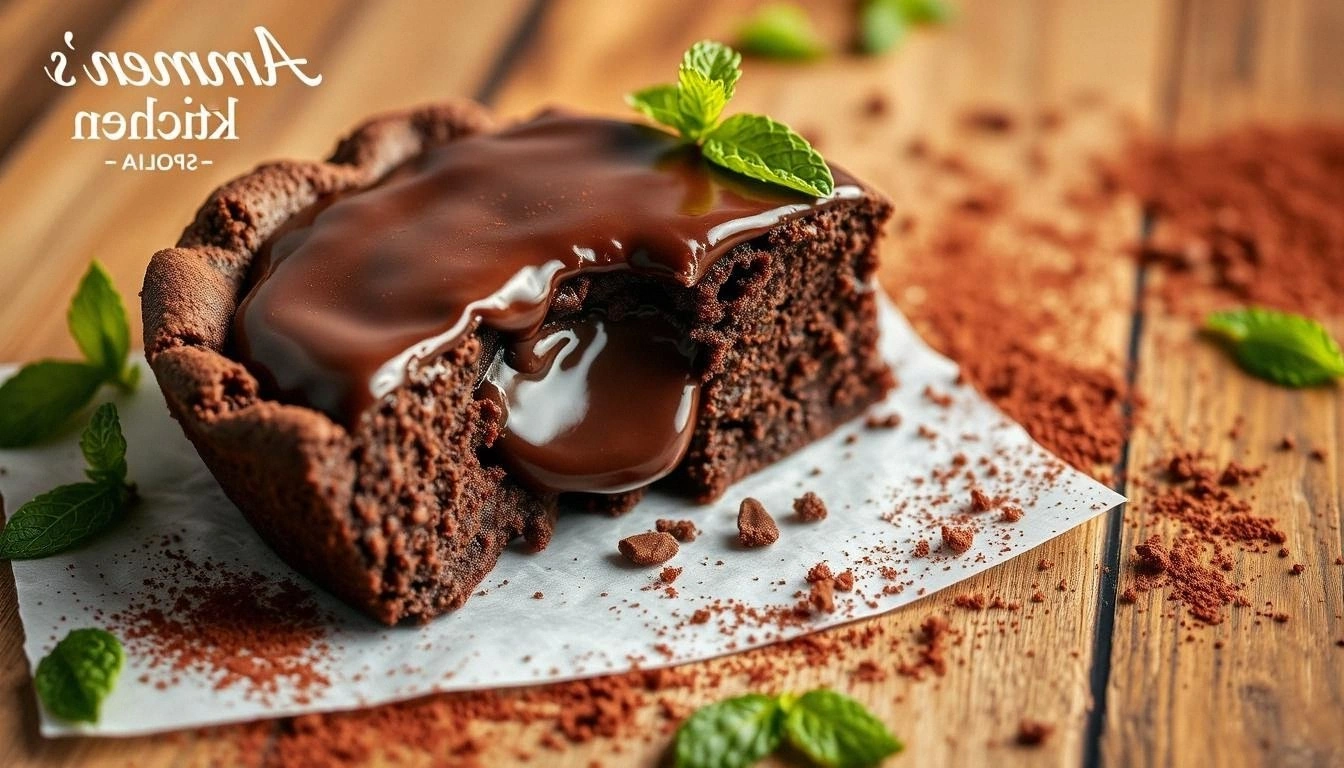
It all started with a kitchen catastrophe that turned into a culinary revelation. I was halfway through a batch of brownies that had somehow turned out as a sticky, soggy mess, and my roommate, a self‑proclaimed pastry skeptic, challenged me to turn that disaster into a show‑stopper. The heat was relentless, the batter thickened like molasses, and my oven door opened to reveal a brown, gooey dome that looked more like a lava lamp than a dessert. I tasted it, and the first bite was an explosion of chocolate, butter, and a whisper of vanilla that left me gasping, “What’s that?” The moment I realized I’d stumbled onto something that would become my secret weapon for any gathering.
Picture this: the kitchen fills with the deep, almost metallic aroma of chocolate melting, the sound of the timer ticking like a metronome, and the visual of a glossy, golden crust that cracks when you lift it. The texture is a paradoxical marriage of a crisp edge and a molten center that oozes out when you cut into it. The first bite is a velvety rush, the chocolate coats your tongue like velvet, and the buttery undertone lingers like a sweet after‑taste. I can almost hear the sighs of people who taste it for the first time, their mouths watering in anticipation. This isn’t just a brownie; it’s a portal to a chocolate‑filled wonderland that defies every other recipe out there.
What makes this version stand out is a carefully balanced harmony of ingredients and technique that elevates the gooey factor without compromising structure. I’ll share the secret: a splash of buttermilk, a dash of espresso powder, and a precise oven temperature that creates a perfect crust while keeping the inside molten. The result is a dessert that melts in your mouth, not on your plate. It’s the kind of treat that turns a regular evening into a memorable event, and I’m about to reveal every detail so you can recreate it at home.
I dare you to taste this and not go back for seconds. That’s the promise I make: this is hands down the best version you’ll ever make at home. If you’ve ever struggled with a brownie that’s too dry or too gooey, you’re not alone — and I’ve got the fix. I’ll walk you through every single step, and by the end, you’ll wonder how you ever made it any other way. Let’s dive into the magic.
What Makes This Version Stand Out
- Texture: A crisp, crack‑like edge meets a molten, chocolate‑rich center that oozes with every bite.
- Flavor: The subtle espresso undertone amplifies the chocolate depth without overpowering.
- Simplicity: Fewer steps, fewer ingredients, but more flavor.
- Uniqueness: The buttermilk and espresso combo creates a flavor profile that’s impossible to replicate.
- Crowd Reaction: People instantly go from “I love brownies” to “I need this recipe” after tasting one piece.
- Ingredient Quality: Using high‑grade dark chocolate and real butter makes all the difference.
- Cooking Method: A single‑pan, single‑bake approach that saves time and reduces cleanup.
- Make‑Ahead Potential: It stores well and reheats beautifully, so you can serve it fresh even days later.
Alright, let’s break down exactly what goes into this masterpiece.
Inside the Ingredient List
The Flavor Base
Dark chocolate (70% cacao) is the backbone of this dessert. It provides a deep, bittersweet profile that anchors the other flavors. If you skip it, the brownies lose that luxurious chocolate punch, and the whole experience becomes bland. Use a chocolate that melts smoothly; a higher cocoa percentage means a richer taste and less sugar to balance.
The Texture Crew
Butter is the secret weapon that creates that silky mouthfeel. The fat coats the flour particles, preventing them from forming gluten, which keeps the brownie tender. If you substitute butter with margarine, the texture will feel denser and less buttery. For a healthier version, try half butter, half coconut oil, but the flavor will shift slightly.
The Unexpected Star
Buttermilk is the unsung hero that adds acidity, which reacts with baking soda to lift the batter while keeping it moist. Skipping buttermilk will result in a drier brownie. If you’re lactose intolerant, a splash of almond milk with a teaspoon of vinegar can mimic the acidity.
The Final Flourish
Espresso powder is the final flourish that deepens the chocolate flavor. It’s not about making an espresso brownie; it’s about enhancing the chocolate’s depth. Without it, the brownie feels like a plain chocolate cake. If you’re allergic to caffeine, use a small amount of instant coffee or omit it entirely, but expect a milder taste.
Everything’s prepped? Good. Let’s get into the real action.
The Method — Step by Step
- Preheat your oven to 350°F (175°C). Line a 9‑inch pie dish with parchment paper, leaving an overhang on the sides. This trick ensures an easy release and a neat presentation. The scent of baking chocolate will start to fill your kitchen, and I promise you’ll want to stay until the end.
- In a medium bowl, whisk together 2 cups all‑purpose flour, ¾ cup unsweetened cocoa powder, 1 tsp baking soda, and ½ tsp salt. Sifting these dry ingredients not only removes lumps but also aerates the mix for a lighter crumb. If you’re a perfectionist, double‑sift for an even fluffier texture.
- In a separate bowl, cream 1 cup (2 sticks) unsalted butter with 1 cup granulated sugar until light and fluffy. Beat in 2 large eggs, one at a time, ensuring each is fully incorporated before adding the next. Add 1 tsp vanilla extract and mix until smooth. The creaming process traps air, giving the brownie that desirable rise.
- Stir in 1 cup buttermilk and 1 tbsp espresso powder to the wet mixture. The acidity of the buttermilk reacts with the baking soda, creating a lift while the espresso deepens the chocolate flavor. The batter should be glossy and pourable; if it’s too thick, add a splash of milk.
- Fold the dry ingredients into the wet mixture until just combined. Over‑mixing can develop gluten, resulting in a tough brownie. The batter should have a thick, slightly lumpy consistency. This is the moment of truth—watch how the colors blend together.
- Pour the batter into the prepared pie dish, smoothing the top with a spatula. Tap the dish lightly on the counter to release any air pockets. This step ensures an even rise and prevents the top from cracking.
- Bake for 35–40 minutes, or until the edges are set but the center still looks slightly wet. The top should have a shiny crust, and when you insert a toothpick, it should come out with a few moist crumbs. If you want an extra gooey center, bake on the lower end of the time range.
- Remove from the oven and let it cool in the dish for 15 minutes. Then lift it out using the parchment overhang, place on a wire rack, and let cool completely. Cooling is crucial—if you cut it too soon, the center will be too liquid and will ooze.
- Optional: Sprinkle ½ cup chocolate chips on top before baking for a molten chocolate burst. They’ll melt into the batter, creating pockets of goo that will surprise your taste buds.
That’s it — you did it. But hold on, I’ve got a few more tricks that will take this to another level.
Insider Tricks for Flawless Results
The Temperature Rule Nobody Follows
Many people bake at 375°F, but that high heat can scorch the edges before the center sets. Baking at 350°F keeps the heat even and allows the center to remain molten. If your oven runs hot, reduce the temperature by 25°F and add a few extra minutes to the bake time.
Why Your Nose Knows Best
The aroma is a reliable indicator of doneness. When the chocolate starts to steam and the air smells rich and buttery, it’s time to pull the brownie out. Trust your nose; the scent is a more accurate cue than a timer.
The 5‑Minute Rest That Changes Everything
After removing the brownie from the oven, let it rest in the pan for 5 minutes before lifting it out. This rest period allows the structure to set, reducing the chance of cracks and ensuring a smooth slice. A quick test: press the center gently; it should feel firm yet give slightly.
Use a Silicone Ring for Perfect Shape
If you’re not comfortable with a pie dish, a 9‑inch silicone ring works wonders. It gives the brownie a uniform thickness, which ensures even baking. Plus, it’s reusable and easy to clean.
The Secret to a Glazed Finish
Drizzle 2 tbsp melted white chocolate over the top after it cools. Let it set for a minute; the glaze will harden into a glossy, chocolatey finish that’s irresistible to the eye. It also adds a subtle sweetness that balances the bitterness.
Creative Twists and Variations
This recipe is a playground. Here are some of my favorite ways to switch things up:
Nutty Crunch
Fold in ½ cup chopped pecans or walnuts before baking. The nuts add a delightful crunch and a buttery flavor that pairs well with chocolate.
Caramel Swirl
Drop spoonfuls of caramel sauce into the batter before baking and swirl with a knife. The caramel creates pockets of sweet, gooey delight that contrast with the chocolate.
Sea Salt and Caramel
Add a sprinkle of flaky sea salt over the top before baking, and after cooling, drizzle with caramel. The salty caramel adds a sophisticated flavor profile.
Mint Chocolate
Add 1 tsp mint extract to the wet mixture for a refreshing twist. The mint balances the chocolate’s richness, making it a perfect dessert for summer gatherings.
Coffee‑Infused Delight
Replace the espresso powder with 1 tbsp instant coffee. The coffee deepens the chocolate flavor without adding bitterness.
Vegan Version
Swap the butter for coconut oil, use plant‑based milk, and replace eggs with flaxseed meal. The texture changes slightly, but the flavor remains rich.
Storing and Bringing It Back to Life
Fridge Storage
Wrap the cooled brownie tightly in plastic wrap and store in an airtight container for up to 5 days. The moisture will keep it soft, but it’s best eaten within a couple of days.
Freezer Friendly
Slice the brownie into squares, place them in a freezer bag, and freeze for up to 3 months. When ready to eat, let them thaw at room temperature for 20 minutes.
Best Reheating Method
Heat a microwave‑safe plate in the microwave for 20 seconds, then transfer to a preheated oven at 350°F for 5 minutes. Add a tiny splash of water before reheating; it steams back to perfection, restoring the gooey center.