Ever watched a pot of rice simmer on the stove while the kitchen smells like a culinary disaster in the making? I was there, the clock ticking, a half‑cooked batch of jasmine rice that had turned into a sticky, unappetizing slab. I stared at the pot, my fingers hovering over the Instant Pot button, and whispered, “This has to be better.” That moment became the spark that lit a fire in my cooking soul, turning a mundane routine into a quest for perfection.
Picture this: the clack of the Instant Pot’s lid, the hiss of steam, the golden shimmer of a freshly sautéed chicken bite, and the subtle aroma of garlic and ginger swirling in the air. The sound of rice grains popping as they toast, the gentle sizzle of eggs scrambling, and the subtle clink of green onions as they’re tossed together. It’s a symphony of textures and flavors that dance in your mouth—each bite a burst of umami, a whisper of sweetness, a hint of heat, and the satisfying crunch of perfectly cooked veggies.
What makes this version stand out from every other Instant Pot fried rice recipe? It’s not just the method; it’s the meticulous layering of flavors, the use of high‑quality rice that’s been cooled to lock in texture, and the secret addition of a splash of rice vinegar that brightens the dish. The chicken is marinated briefly in soy sauce and sesame oil, giving it a subtle depth that pairs flawlessly with the savory sauce base. The final touch? A quick stir‑in of toasted sesame seeds that adds a nutty finish and a visual pop that makes the dish Instagram‑ready.
I dare you to taste this and not go back for seconds—because once you try it, you’ll realize that every bite is a revelation, a small triumph over the blandness that often plagues takeout. This is hands down the best version you’ll ever make at home, and the confidence you’ll feel when you present it to friends or family will be palpable. The next section will break down exactly what goes into this masterpiece, so you can replicate the magic every time.
What Makes This Version Stand Out
- Taste: The sauce is a balanced blend of soy, oyster, and sesame that coats every grain like velvet, delivering a savory depth that lingers on the palate.
- Texture: The rice remains fluffy yet firm, thanks to the pre‑cooking cooling step that prevents clumping during the sauté.
- Convenience: The Instant Pot does all the heavy lifting, so you can focus on flavor while the appliance handles the heat and timing.
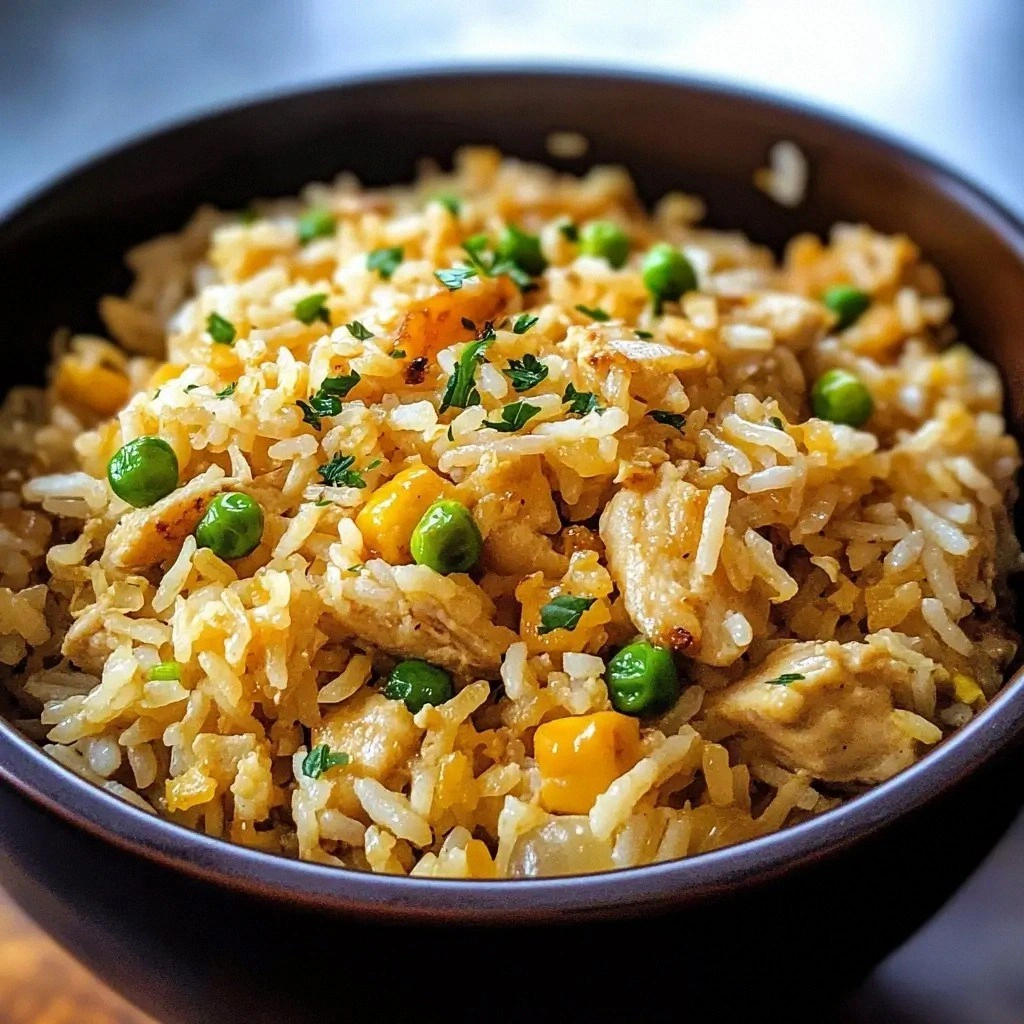
- Visual Appeal: Bright green peas, golden onions, and a drizzle of sesame oil create a dish that looks as good as it tastes.
- Make‑ahead Potential: Cook once, store, and reheat with a splash of water—this dish keeps its integrity even after refrigeration.
- Ingredient Quality: Fresh, high‑quality produce and lean chicken are the backbone, ensuring every bite is clean and satisfying.
- Adaptability: Swap the protein for shrimp, tofu, or keep it vegetarian; the flavor profile remains intact.
- Time Efficiency: Prep in 15 minutes, cook in 30, and you’re ready to serve in under an hour.
Inside the Ingredient List
The Flavor Base
Soothing Soy Sauce: The backbone of the dish, it provides umami and depth. A generous pour ensures every grain is coated, but watch the saltiness—adjust to taste after you add the oyster sauce. If you’re craving a sweeter edge, a teaspoon of sugar balances the acidity and brings harmony. Skipping it will leave the dish flat, like a plain canvas waiting for paint.
The Texture Crew
Crispy Chicken: Diced boneless skinless chicken breast, lightly seasoned and seared, adds protein and a satisfying bite. Marinate it briefly in soy sauce and sesame oil for an extra flavor boost. If you prefer a different protein, shrimp or tofu will work just as well, but keep the sear to lock in moisture. Without this protein, the dish feels incomplete, like a song missing its chorus.
The Unexpected Star
Rice Vinegar: A splash of rice vinegar brightens the dish, cutting through the richness and adding a subtle tang. It’s the secret ingredient that elevates the flavor profile from ordinary to extraordinary. If you can’t find it, a dash of lime juice will do the trick, but the classic vinegar gives the most authentic taste. Omit it and the dish will lack that crisp, clean finish.
The Final Flourish
Toasted Sesame Seeds: A sprinkle on top adds a nutty aroma and a visual pop that turns the dish into a feast for the eyes. They’re not just garnish; they’re a flavor enhancer that completes the sensory experience. If you’re gluten‑free, opt for sunflower seeds or pine nuts for a similar crunch. Leaving them out feels like forgetting the final brushstroke on a masterpiece.
Everything's prepped? Good. Let's get into the real action that turns ordinary rice into a culinary triumph.
The Method — Step by Step
- Set the Instant Pot to sauté mode. Add the vegetable oil and wait until it shimmers like a calm lake. This step is crucial; if the oil is too hot, the chicken will burn before it cooks through. Keep an eye on the temperature; you want a gentle sear, not a searing inferno.
- Introduce the diced chicken. Season it lightly with salt and pepper, and let it brown on all sides. The sear creates a caramelized crust that locks in juices. If you’re in a hurry, use pre‑cut chicken for speed, but the flavor will be richer with freshly diced pieces. Watch the chicken; when it releases from the pot, it’s ready to move on.
- Stir in minced garlic and grated ginger. Sauté until the aroma becomes a fragrant halo. This combination adds depth and warmth, turning the dish from simple to sensational. Be careful not to let them burn; a quick 30 seconds is enough to release their essential oils.
- Introduce peas and carrots. Cook for 1–2 minutes, stirring constantly. The vegetables should remain crisp, not mushy, to maintain a delightful bite. If you prefer softer veggies, let them cook a bit longer, but the contrast in textures is part of the dish’s charm.
- Push veggies to the side and scramble eggs. Pour the beaten eggs into the cleared space and stir until just set. The eggs add richness and protein, binding the rice and veggies together. Once the eggs are slightly runny, combine them with the rest of the ingredients to ensure even distribution.
- Add the cooked jasmine rice. Stir to combine, ensuring each grain is coated with the savory mixture. Toast the rice for an additional 2 minutes to develop a subtle nutty flavor. The rice should feel slightly dry and not overly wet, indicating proper texture.
- Return the chicken to the pot. Pour soy sauce, oyster sauce, and sesame oil over the mixture, stirring until everything is evenly distributed. The sauces should coat the rice and chicken, creating a glossy, appetizing sheen. If the mixture feels dry, add a tablespoon of water to achieve the desired consistency.
- Close the lid and set to manual, low pressure, 0 minutes. This quick pressure cook step seals in flavors without overcooking. Immediately perform a quick release to open the pot; do not let the steam linger, as it can soften the rice further. The moment you open the lid, the aroma will fill the kitchen, making you feel like a master chef.
- Stir in green onions. Taste the dish and adjust seasoning with additional salt or soy sauce if necessary. The green onions add a fresh, bright note that cuts through the richness. Sprinkle toasted sesame seeds on top for a final touch of crunch and aroma.
That's it—you did it. But hold on, I've got a few more tricks that'll take this to another level, ensuring each bite is flawless and unforgettable.
Insider Tricks for Flawless Results
The Temperature Rule Nobody Follows
Control the heat during sauté. Start at medium heat and gradually increase; this prevents the oil from smoking and the chicken from burning. If the oil starts to bubble, lower the heat immediately. This simple adjustment keeps the dish from turning into a charred mess. A well‑controlled sauté ensures a golden sear that adds depth.
Why Your Nose Knows Best
Smell the rice before adding sauce. It should have a faint nutty aroma. If it smells flat, let it toast a bit longer. The aroma signals that the rice is ready to absorb flavors. Trust your nose; it’s the quickest quality check.
The 5‑Minute Rest That Changes Everything
Let the dish rest for 5 minutes after pressure release. This allows the flavors to meld and the rice to settle, preventing it from becoming too wet. The rest period also ensures the texture is consistent throughout. Skipping this step can result in uneven seasoning.
Avoiding the Sticky Rice Trap
Cool the rice before adding it to the pot. Warm rice releases moisture, making the dish soggy. Chill or let it sit at room temperature for 15 minutes. If you’re short on time, toss the rice in a bowl of cold water to cool faster. This trick keeps the grains separate and fluffy.
Balancing Sweetness and Salt
Start with a small amount of sugar. The sugar balances the salty sauces and adds depth. Taste as you go; you can always add more, but you can’t remove it once it’s in. This step ensures the dish is not overly salty or bland.
Final Touch: The Sesame Oil Splash
Drizzle sesame oil at the end. It adds a fragrant, nutty aroma that elevates the dish. The oil coats the rice, giving it a glossy finish. Add it just before serving to preserve its aroma. A final splash is the secret to restaurant‑grade flavor.
Creative Twists and Variations
This recipe is a playground. Here are some of my favorite ways to switch things up:
Spicy Szechuan Kick
Add a tablespoon of Szechuan peppercorns and a dash of chili oil for a numbing heat that balances the savory base. The peppercorns give a tingling sensation, while the chili oil adds a smoky depth. Pair it with a side of pickled cucumbers to cut through the spice. This variation is a crowd‑pleaser at dinner parties.
Thai Coconut Twist
Replace half the water with coconut milk and add a pinch of curry powder for a fragrant, creamy version. The coconut milk brings a silky texture and a subtle sweetness. The curry powder adds warmth and complexity. This version pairs beautifully with grilled fish or shrimp.
Mediterranean Medley
Swap the soy sauce for a splash of olive oil and a handful of chopped olives. Add roasted red peppers and feta cheese for a Mediterranean vibe. The olives provide brine, while the feta adds tang. This twist turns the dish into a flavorful, healthy lunch.
Vegan Power Bowl
Replace the chicken with diced tofu and use tamari instead of soy sauce for a gluten‑free option. Add sliced mushrooms for umami and a handful of kale for extra greens. This version is hearty, protein‑rich, and satisfies even the most discerning vegans.
Seafood Sensation
Use shrimp or scallops instead of chicken, sauté them until pink, and add a squeeze of lemon at the end. The citrus brightens the dish, while the seafood brings a delicate sweetness. This version is perfect for a quick weeknight dinner.
Breakfast Fried Rice
Add crumbled breakfast sausage or bacon for a savory twist. Use a splash of maple syrup to sweeten the sauce, creating a sweet‑savory balance. This version works wonders for brunch or a late‑night snack.
Storing and Bringing It Back to Life
Fridge Storage
Cool the fried rice to room temperature, then transfer it to an airtight container. Store it in the refrigerator for up to 3 days. The rice will maintain its texture if kept in a sealed environment. When reheating, add a splash of water to revive moisture.
Freezer Friendly
Pack the rice in a freezer‑safe bag, removing as much air as possible. Freeze for up to 2 months. Thaw in the refrigerator overnight before reheating. The rice will keep its flavor and texture if handled properly.
Best Reheating Method
Reheat in a skillet on medium heat, adding a tablespoon of water or broth to steam the rice. Stir frequently until hot and moist. Alternatively, microwave with a splash of water, covering with a damp paper towel. This method restores the dish’s original aroma and crunch.