Introduction
It started with a kitchen catastrophe I’ll never forget: I was trying to bake a simple cake for a Halloween party and, in a rush, I accidentally poured the entire cake mix into a single pot, thinking it was a small batch. The batter thickened into a gooey sludge that clung to the pot like a midnight fog, and the smell of burnt sugar wafted through the air. That night, I stared at the ruined batter, my heart racing, and promised myself I’d never let that happen again. I vowed to create a recipe that would not only save the day but also deliver a spooktacular treat that would make everyone gasp in delight.
Picture the scene: a dimly lit kitchen, the faint glow of a Halloween string of lights, the clink of glass as I pour a jar of frosting into a bowl, the sweet scent of vanilla and chocolate mingling with the sharp tang of candy melts. The sound of a mixer whirring, the rhythmic tapping of a spoon against the counter, and the anticipation of seeing the first pop pop out of the mold. When you take your first bite, the frosting melts into a silky, velvety coating, the candy shell crackles like a crisp autumn leaf, and the crunch of cookie crumbs gives way to a sweet, almost buttery finish. It’s a sensory experience that feels like a tiny, edible spell.
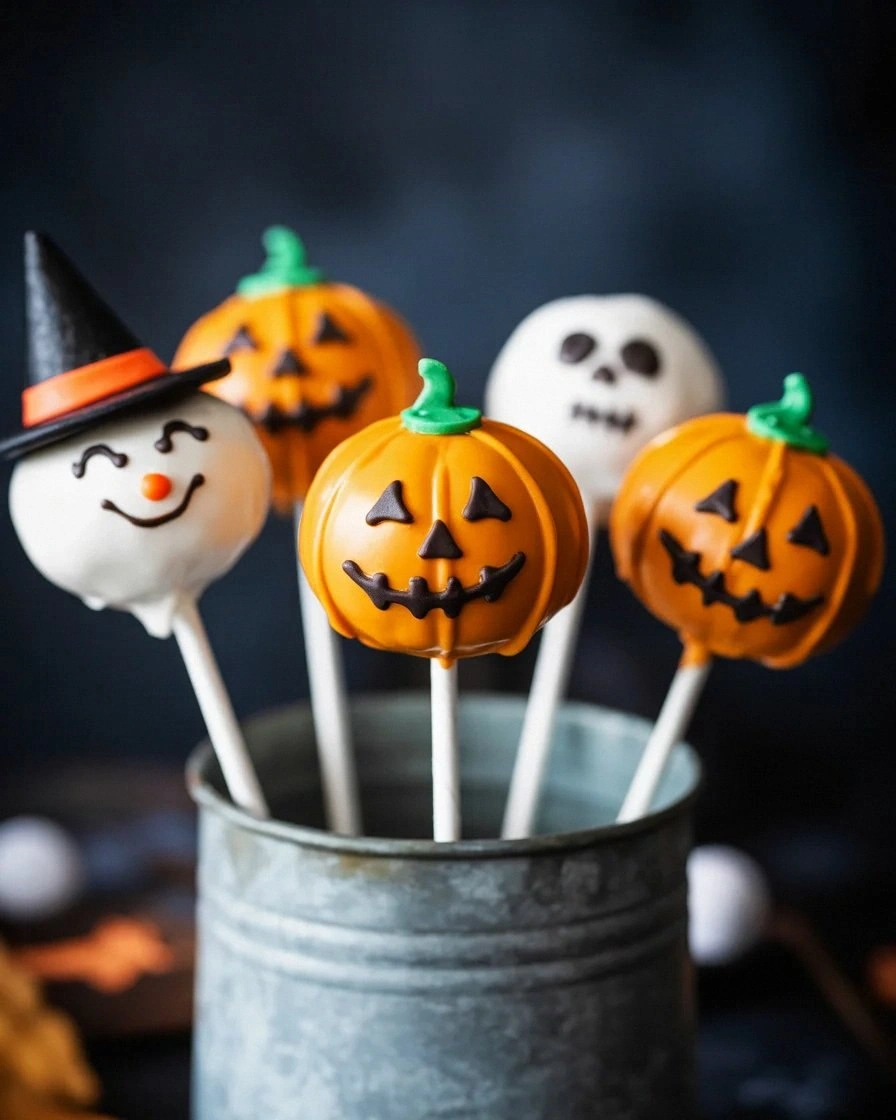
What sets this version apart from the countless Halloween cake pop recipes you’ll find online is the deliberate layering of textures and flavors that I discovered during my experiments. I used a pre-made cake mix to guarantee consistent structure, then added a splash of food coloring for that classic spooky hue. The candy melts are melted to just the right viscosity, allowing them to coat the pops without cracking, while the edible eyes and sprinkles add a playful, mischievous twist. The result is a cake pop that’s not only delicious but also visually arresting, making it a showstopper at any party.
But there’s a twist you won’t see in other recipes: I incorporated crushed cookies as a subtle, crunchy undertone that lingers long after the frosting has melted. This hidden layer of texture transforms a simple treat into a complex, multi-sensory experience. I dare you to taste this and not go back for seconds. Let me walk you through every single step — by the end, you’ll wonder how you ever made it any other way.
What Makes This Version Stand Out
- Taste: The combination of vanilla cake, creamy frosting, and sweet candy melts creates a flavor profile that balances richness with a hint of caramelized sugar.
- Texture: Each pop delivers a crisp, crackling shell that gives way to a silky, melt‑in‑your‑mouth interior.
- Color: Two tablespoons of food coloring give the shell a deep, ominous hue that looks like a midnight potion.
- Presentation: The edible eyes and sprinkles are strategically placed to give each pop a character that feels alive.
- Make‑Ahead: Once the pops are set, you can refrigerate them for up to a week, making this the perfect prep‑ahead treat.
- Time: The entire process takes less than an hour, so you can impress your guests without a long wait.
- Accessibility: It uses common pantry items and a cake mix, so you don’t need to hunt for exotic ingredients.
- Portability: Each pop is bite‑size, making them easy to transport and serve at large gatherings.
Alright, let’s break down exactly what goes into this masterpiece…
Inside the Ingredient List
The Flavor Base
At the heart of these pops lies the cake mix. It provides a sturdy yet tender structure that holds the frosting and candy shell together. The frosting, whether vanilla or chocolate, adds a creamy contrast to the crunchy candy exterior. Together, they create a harmonious balance between sweet and buttery notes. Skipping the frosting would leave the pops dry and unappetizing, so don’t cut corners on this step.
The Texture Crew
Candy melts are the secret to that irresistible, crackly shell. By melting them just until they’re liquid but not too hot, you ensure they coat the pops evenly without hardening too quickly. Pop sticks are the backbone of each pop, giving them shape and a convenient handle for serving. Sprinkles and edible eyes add a playful, whimsical touch that turns each pop into a character. If you don’t have edible eyes, a few strategically placed chocolate chips will do the trick.
The Unexpected Star
Crushed cookies add a subtle crunch that contrasts beautifully with the smooth frosting. They also provide a hint of buttery flavor that elevates the overall taste profile. Mini candies, such as tiny chocolate chips or rainbow M&Ms, offer bursts of flavor that keep the palate engaged. If you’re feeling adventurous, try swapping the cookies for crushed graham crackers for a slightly sweet, toasted nuance.
The Final Flourish
The final touch is the edible eyes. They’re not just decorative; they give the pops a living, mischievous look that captures the Halloween spirit. If you’re short on time, a small dab of melted chocolate on a toothpick can mimic the effect. This finishing step turns a simple cake pop into a character that your guests will want to keep for themselves.
Everything's prepped? Good. Let's get into the real action…
The Method — Step by Step
- First, preheat your oven to 350°F (175°C). Line a muffin tin with paper liners to prevent sticking. In a large mixing bowl, combine the entire box of cake mix with the recommended amount of water, milk, oil, and eggs. Whisk until the batter is smooth and free of lumps. The batter should be pourable but thick enough to hold its shape. This step is the foundation of the entire pop.
- Bake the batter for 20 minutes or until a toothpick inserted in the center comes out clean. Let the cakes cool completely on a wire rack; this ensures they don’t crumble when you cut them into pieces. While the cakes are cooling, you’ll want to start the candy melt. Place the candy melts in a microwave-safe bowl and heat in 20-second intervals until fully melted. Stir each time to avoid scorching. The melted candy should be glossy and pourable.
- Once the cakes are cool, cut them into small cubes roughly 1.5 inches on each side. Use a small cookie cutter or a sharp knife for precision. Gently press each cube into a pop mold or a small paper cup, leaving a small indentation at the top for the stick. This step requires patience; rushing can lead to uneven pops.
- Insert a pop stick into the center of each cake cube, pressing firmly to ensure it stays in place. The stick should be flush with the top of the cube. This is the moment of truth: the pop sticks must be secure, otherwise the pops will fall apart during the coating process.
- Dip each cake cube into the melted candy melt, rotating to coat all sides. Let excess melt drip off before placing the coated pop onto a parchment-lined tray. The candy shell should be thick enough to hold the frosting but not so thick that it cracks. This step requires precision; too much candy can make the pop brittle.
- Allow the candy shells to set for about 5 minutes until they’re firm to the touch. If you’re in a hurry, you can place the tray in the fridge for a few minutes to speed up the process. Watch out: if the candy is too hot when it hits the pop, it will create air pockets that can cause cracks.
- Once the shells are set, spread a thin layer of frosting over each pop using a small offset spatula or the back of a spoon. The frosting should be smooth and glossy, giving the pop a polished look. While the frosting is still wet, sprinkle crushed cookies over the top, then add a few mini candies. This layering creates a delightful crunch and burst of flavor.
- Finally, place an edible eye on each pop, positioning it to look like it’s peeking out. Allow the frosting to set for another 10 minutes before serving. The pops are now ready to dazzle your guests with their spooky appearance and delicious taste. That’s it — you did it. But hold on, I've got a few more tricks that'll take this to another level…
Insider Tricks for Flawless Results
The Temperature Rule Nobody Follows
Maintaining the candy melt at exactly 120°C (248°F) is critical. If it’s too hot, it will harden too quickly and crack; if it’s too cool, it won’t coat properly. I use a candy thermometer to keep it steady, which saves me from the dreaded “cracked candy” moment. A friend tried skipping this step once, and the result was a soggy, unappetizing mess.
Why Your Nose Knows Best
Before you start coating, give the candy melt a sniff. A faint sweet aroma signals that it’s ready. A strong, metallic smell means it’s overheated. Trust your nose; it’s a reliable sensor that even seasoned bakers use to gauge readiness.
The 5-Minute Rest That Changes Everything
After dipping, let the pops rest for five minutes before applying frosting. This short pause allows the candy shell to set properly, preventing the frosting from smearing. I’ve seen pops that were rushed come out uneven and soggy. Give them the rest they deserve.
Don’t Skip the Pop Stick
Even though it’s a small detail, the pop stick is essential for stability. A poorly inserted stick can cause the pop to topple over, especially when you’re moving them around to coat. Make sure the stick is centered and secure.
Keep the Frosting Cool
Frosting that’s too warm will melt the candy shell, creating a mess. Chill the frosting in the fridge for 10 minutes before using. This keeps it firm and easy to spread, ensuring a smooth finish.
Creative Twists and Variations
This recipe is a playground. Here are some of my favorite ways to switch things up:
Chocolate‑Laced Surprise
Swap the vanilla frosting for a rich chocolate ganache. Use dark chocolate candy melts for the shell, and add a sprinkle of sea salt to the frosting for a sweet‑salty contrast. Perfect for chocolate lovers.
Minty Monster
Add a few drops of green food coloring to the candy melt and frosting. Use crushed mint cookies and mint chocolate chips for a refreshing twist. The pops will look like little green goblins.
Fruit‑Burst Edition
Incorporate dried fruit pieces, like cranberries or apricots, into the frosting layer. Use a fruit‑flavored candy melt, such as raspberry or blueberry, for a fruity shell. The pops will burst with natural sweetness.
Nutty Crunch
Replace the crushed cookies with finely chopped nuts, such as almonds or pecans. Add a drizzle of honey over the frosting for a caramelized flavor. These pops will have a delightful crunch.
Vegan Version
Use a plant‑based cake mix, dairy‑free frosting, and coconut‑based candy melts. Add a splash of vanilla extract for extra depth. These pops will be just as spooky and delicious.
Miniature Monster Mints
Use peppermint candy melts and add tiny candy hearts as the final flourish. The pops will look like tiny, smiling monsters with a minty bite.
Storing and Bringing It Back to Life
Fridge Storage
Place the pops in an airtight container in the refrigerator. They will stay fresh for up to a week. The frosting will firm up, so let them sit at room temperature for 15 minutes before serving to soften them slightly.
Freezer Friendly
For longer storage, wrap each pop individually in plastic wrap and place them in a freezer bag. They can be stored for up to three months. Thaw at room temperature for 30 minutes before serving.
Best Reheating Method
To revive the frosting’s softness, gently warm the pops in a microwave for 5–10 seconds, then let them sit for a minute. Adding a tiny splash of water before reheating steams the frosting back to perfection, keeping it glossy and creamy.