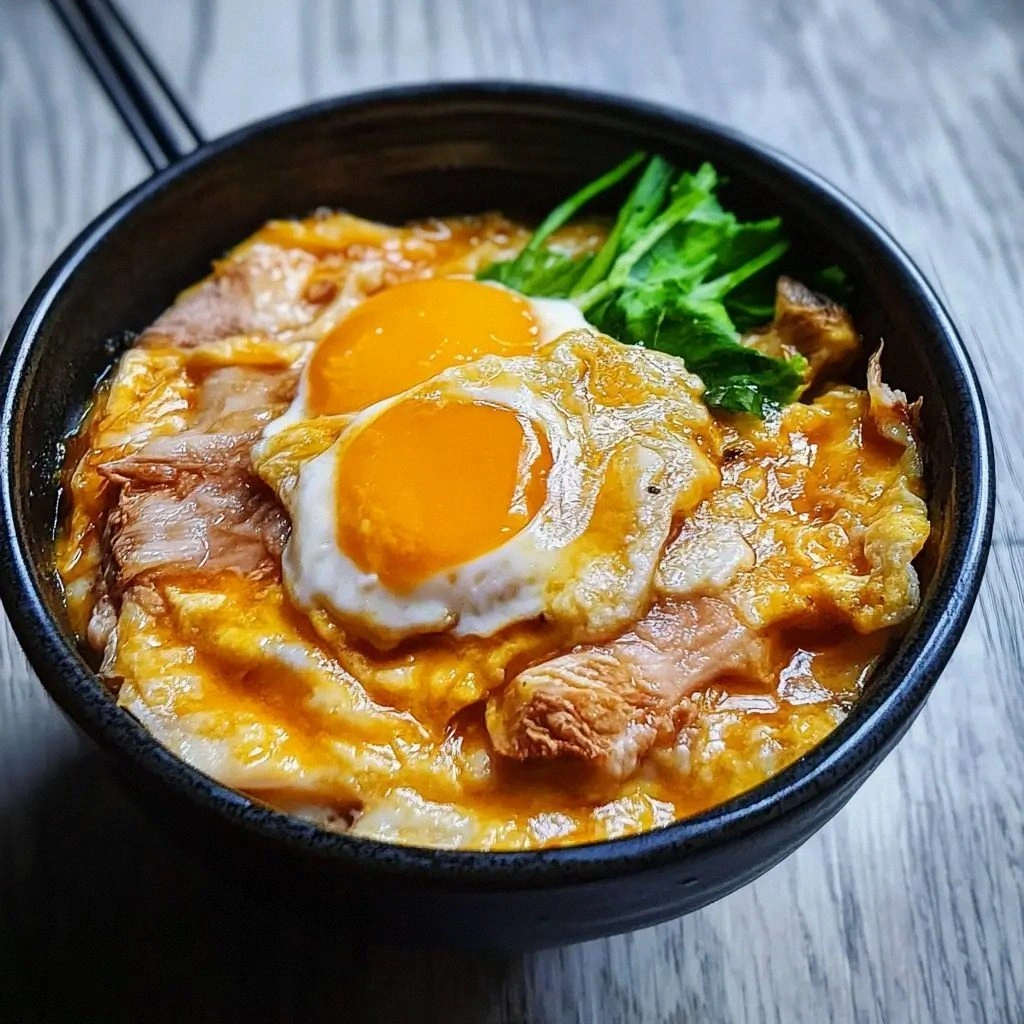
I still remember the night I burned a pot of rice in a hurry, the kitchen smelling like burnt toast and regret. That disaster sparked a quest: a dish that could turn a culinary mishap into a comforting triumph. Enter Oyakodon, the Japanese “parent‑and‑child” donburi, but reimagined for the modern palate. This isn’t just another rice bowl; it’s a symphony of savory, sweet, and umami that will make your taste buds do the cha‑cha.
Picture this: a steaming pan, the sizzling whisper of onions, a fragrant swirl of dashi, soy sauce, and mirin mingling like dancers in a moonlit ballroom. The aroma rises, mingling with the soft crackle of eggs as they begin to set, filling the air with anticipation. Each bite is a harmony—soft, tender chicken, silky egg, and fluffy rice that absorbs the sauce like a sponge. It’s the kind of meal that makes you want to pause, inhale deeply, and savor the moment.
What makes this version stand out? It’s the meticulous layering of flavors and textures, the use of fresh, high‑quality ingredients, and a few unconventional twists that elevate the classic. I dare you to taste this and not go back for seconds. If you’ve ever thought Oyakodon was bland or too simple, you’re not alone—this recipe will shatter that notion and prove you’re missing out. Let me walk you through every single step—by the end, you’ll wonder how you ever made it any other way.
What Makes This Version Stand Out
- Flavor Depth: The sauce is a balanced blend of dashi, soy sauce, mirin, and a hint of sugar, creating a velvety glaze that coats every grain of rice. It’s not just salty; it’s layered, with subtle sweetness and umami that linger on the tongue.
- Texture Contrast: Tender chicken thighs meet silky eggs and fluffy rice, while scallions add a fresh, crunchy bite that cuts through the richness. The result is a mouthfeel that feels both comforting and exciting.
- Ingredient Quality: Using fresh, local chicken and hand‑picked scallions elevates the dish. The dashi, made from kombu and bonito flakes, brings a depth that store‑bought stocks can’t match.
- Time Efficiency: The entire process takes under 45 minutes, making it a perfect weeknight dinner that feels indulgent without the fuss.
- Make‑Ahead Friendly: The dish can be cooked ahead and reheated without losing flavor, making it ideal for meal prep or entertaining.
- Visual Appeal: A splash of sesame seeds and a drizzle of sesame oil give the final plate a glossy, appetizing look that’s Instagram‑ready.
Inside the Ingredient List
The Flavor Base
Dashi is the heart of the sauce, providing a subtle oceanic umami that grounds the dish. Kombu and bonito flakes simmer in water to extract a clear, savory broth that’s far superior to instant ramen stock. If you can’t find kombu, a splash of miso paste can mimic the depth, but keep it light to avoid overpowering the delicate flavors.
Soy sauce adds saltiness and color, while mirin brings a gentle sweetness that balances the savory elements. Together they create a glaze that coats the rice and chicken, turning each bite into a silky experience. Skipping any of these will leave the dish feeling flat and one‑dimensional.
The Texture Crew
Chicken thighs are chosen for their juiciness and rich flavor. Their fat content keeps the meat moist, even when cooked quickly. If you prefer a leaner option, skinless chicken breast works, but be careful not to overcook it.
Eggs are the star of the texture contrast—soft, slightly runny yolks that mingle with the rice. Whisking the eggs lightly before adding them to the pan ensures they cook evenly and prevent clumping. A pinch of salt in the eggs brightens their natural flavor.
The Unexpected Star
Scallions add a fresh, peppery bite that cuts through the richness of the sauce. Their bright green color also makes the dish visually striking. If scallions are out of season, thinly sliced green onions or even a handful of chopped cilantro can provide a similar freshness.
Sesame oil and sesame seeds finish the dish with a nutty aroma and a subtle crunch. They’re optional, but they elevate the overall experience, giving the bowl a polished, restaurant‑like feel.
The Final Flourish
Rice is the canvas for this dish—choose short‑grain Japanese rice for its sticky texture, which soaks up the sauce beautifully. Pre‑cooking the rice ensures it’s fluffy and ready to absorb the flavors. If you’re short on time, instant rice works, but the texture will differ.
A splash of water before reheating (if you’re storing leftovers) keeps the rice from drying out, maintaining its soft, pillowy quality. The trick is to add just enough moisture to steam it back to life without making it soggy.
Everything’s prepped? Good. Let’s get into the real action.
The Method — Step by Step
- Prepare the broth: In a medium saucepan, combine 2 cups water, 2 sheets kombu, and 1 cup bonito flakes. Let it simmer for 10 minutes, then strain. The resulting dashi should be clear and fragrant. This is the foundation—skip it and you’ll lose the depth of flavor that makes this dish special.
- Season the sauce: Add 3 tablespoons soy sauce, 2 tablespoons mirin, 1 tablespoon sugar, and a pinch of salt to the dashi. Stir until the sugar dissolves. The sauce should smell sweet and salty, like a gentle hug. This step is your flavor checkpoint; if it tastes off, adjust immediately.
- Cook the chicken: Heat a tablespoon of sesame oil in a large skillet over medium heat. Add the sliced chicken and sauté until browned on all sides, about 3–4 minutes. The chicken should release its juices and become tender. Keep the heat steady—over‑high heat will dry it out.
- Add the onions: Toss in 1 thinly sliced onion and cook until translucent, about 2 minutes. The onions soften and caramelize slightly, adding a subtle sweetness that complements the sauce. The aroma will start to build—listen for that inviting scent.
- Pour the sauce: Reduce the heat to low and pour the prepared sauce over the chicken and onions. Let it simmer gently for 5 minutes so the flavors meld. The liquid should thicken slightly, coating the ingredients. This is the moment of truth—watch the sauce’s consistency.
- Introduce the eggs: Beat 4 eggs in a bowl with a pinch of salt. Slowly pour the eggs over the simmering mixture, swirling gently with a wooden spoon to create soft curds. The eggs should set within 1–2 minutes, forming a silky layer. Don’t rush—let them cook just enough to stay moist.
- Finish with scallions: Roughly chop 2 scallions and sprinkle them over the top. The green color adds a pop of freshness and a subtle crunch. This final touch brightens the dish and balances the richness of the sauce.
- Serve over rice: Divide cooked rice into four bowls. Ladle the chicken, egg, and sauce mixture over the rice. Garnish with sesame seeds and a drizzle of sesame oil. The dish should look glossy and inviting—ready to be devoured.
That’s it—you did it. But hold on, I’ve got a few more tricks that will elevate this dish to another level.
Insider Tricks for Flawless Results
The Temperature Rule Nobody Follows
Keep the skillet at medium‑low heat throughout the cooking process. This prevents the sauce from burning and ensures the eggs set evenly. A quick test: sprinkle a tiny drop of water on the pan—if it sizzles immediately, lower the heat.
Why Your Nose Knows Best
Trust the aroma as your primary indicator of doneness. When the onions are translucent and the sauce has a slight caramel scent, you’re ready for the next step. If it smells too raw, give it another minute.
The 5‑Minute Rest That Changes Everything
After cooking, let the bowl rest for 5 minutes before serving. The sauce will thicken slightly, and the flavors will marry. This rest period also allows the rice to absorb the liquid, making each bite richer.
The Perfect Egg Curd
Whisk the eggs just until the whites and yolks combine—over‑whisking creates a dry texture. A light whisk preserves the silky mouthfeel that defines Oyakodon. If you like a slightly runny yolk, beat less and cook faster.
The Quick Heat‑Up Hack
When reheating leftovers, add a tablespoon of water to the pan and cover. The steam will rehydrate the rice and eggs without drying them out. A splash of soy sauce can also refresh the flavor profile.
Creative Twists and Variations
This recipe is a playground. Here are some of my favorite ways to switch things up:
Spicy Sriracha Splash
Add a tablespoon of Sriracha to the sauce for a fiery kick. The heat complements the sweetness and brings a bold, modern twist. Great for those who like a little spice in their comfort food.
Miso‑Infused Umami
Stir in a tablespoon of white miso into the dashi for an extra layer of depth. The miso adds a creamy texture and a richer flavor profile. Perfect for a rainy evening when you crave something hearty.
Citrus Brightener
Finish the dish with a squeeze of yuzu or lemon juice. The citrus brightens the overall taste and cuts through the richness. It’s a refreshing contrast that makes the dish feel lighter.
Vegetarian Version
Replace chicken with diced shiitake mushrooms or tofu. The mushrooms provide earthiness, while tofu offers a creamy texture. Maintain the same sauce for a vegetarian take that’s still authentic.
Seafood Surprise
Swap the chicken for shrimp or scallops. The seafood cooks quickly and pairs beautifully with the sweet‑salty sauce. This variation adds a luxurious touch suitable for special occasions.
Soba Noodle Switch
Serve the sauce and toppings over cooked soba noodles instead of rice. The chewy noodles create a different mouthfeel, and the dish becomes a fusion bowl. Ideal for a quick lunch when you want something different.
Storing and Bringing It Back to Life
Fridge Storage
Store the cooked dish in an airtight container for up to 2 days. Keep the rice separate if possible to avoid sogginess. When ready to eat, reheat in a microwave or on the stove, adding a splash of water to revive moisture.
Freezer Friendly
Freeze the dish for up to 1 month in freezer‑safe containers. Thaw overnight in the refrigerator before reheating. The texture may change slightly, but the flavor remains robust.
Best Reheating Method
Reheat on a low‑heat skillet, stirring gently, and add a teaspoon of water or dashi. Cover for a minute to trap steam. The goal is to keep the eggs moist and the sauce glossy, not dry or rubbery.