Picture this: a Tuesday afternoon, the kitchen humming, and the scent of roasted pumpkin drifting from the oven like a warm hug. I was halfway through a bland, store‑bought pumpkin pie when I decided to ditch the crust for something more daring. The result? A homemade pumpkin pie crisp that melts in your mouth and leaves a lingering caramelized crunch that makes even the most seasoned dessert lovers swoon. I swear, the first bite felt like falling into a bowl of velvety spice‑infused dreams, and I immediately knew I had stumbled onto something extraordinary. This isn’t just another pumpkin recipe—it’s a culinary revelation that turns ordinary ingredients into a symphony of flavor. By the time the crisp finished baking, the kitchen was alive with the intoxicating aroma of toasted oats and cinnamon, and I could barely keep my hands off the spoon.
From the moment I cracked the first egg, the kitchen became a laboratory of aromas and textures. The pumpkin puree glowed like a golden sunrise, its subtle sweetness balanced by a hint of earthiness that only fresh pumpkin can provide. Each whisk of the evaporated milk added a silky richness that turned the filling into a silky custard, while the brown sugar introduced a deep molasses note that danced on the tongue. The spices—pumpkin pie spice, cinnamon, a pinch of salt—worked in unison, creating a fragrant halo that seemed to whisper secrets of autumn. My friends, who had been skeptical of pumpkin desserts, were instantly hooked when they tasted the first spoonful. The combination of creamy filling and crunchy oat topping is a paradox that satisfies both comfort and adventure seekers alike.
I know what you’re thinking: there are countless pumpkin recipes out there, so what makes this one stand out? The answer lies in the meticulous layering of textures and flavors. The crisp topping isn’t just a garnish; it’s a character that sings with buttery, nutty undertones, and the optional nuts add a satisfying crunch that contrasts beautifully with the custard’s silkiness. The use of evaporated milk instead of heavy cream gives the filling a lighter body without sacrificing richness, and the precise balance of sugars keeps the dessert from feeling cloying. The result is a dessert that feels both indulgent and wholesome, a sweet treat that won’t leave you feeling guilty or weighed down. I dare you to taste this and not go back for seconds—trust me, you’ll be craving more.
Most pumpkin pie recipes get this completely wrong, either by over‑cooking the filling or by using a bland topping that lacks depth. The secret to this version is the harmony of the filling’s silky custard base with a crisp topping that has a buttery, toasted crunch. Picture yourself pulling this out of the oven, the whole kitchen smelling incredible, and seeing that golden crust crackle as you cut into it. The filling will be silky, the topping will be crisp, and every bite will deliver a burst of warmth that feels like a hug from a loved one. This is hands down the best version you'll ever make at home, and it’s so simple that even novice bakers can pull it off flawlessly. If you've ever struggled with pumpkin desserts, you're not alone—and I've got the fix.
Let me walk you through every single step—by the end, you'll wonder how you ever made it any other way. From the first whisk to the final garnish, this recipe is a journey that blends science and creativity. The process is forgiving, yet precise, and the result is a dessert that is both comforting and impressive. So grab your apron, preheat your oven, and let’s dive into the details that make this homemade pumpkin pie crisp truly unforgettable.
What Makes This Version Stand Out
- Taste: The flavor profile is a harmonious blend of sweet, spice, and subtle earthiness that elevates the pumpkin's natural taste. Each spoonful delivers a warm, comforting note that feels like a hug in a bowl. The careful balance of sugars ensures the dessert is never overpowering.
- Texture: The creamy custard contrasts with a buttery, toasted oat topping that provides a satisfying crunch. The crisp edges crackle like thin ice when you bite into them, while the filling remains silky. This duality makes every bite a delightful surprise.
- Simplicity: With only a handful of pantry staples, you can craft a gourmet dessert without a trip to the grocery store. The recipe is straightforward, yet the outcome is sophisticated. It’s ideal for busy evenings or last‑minute gatherings.
- Unique Twist: Using evaporated milk gives the filling a silky lightness that sets this recipe apart from traditional heavy cream versions. The milk’s lower fat content keeps the custard airy, allowing the spices to shine. The result is a lighter, more elegant dessert.
- Crowd‑Pleaser: Friends and family line up for seconds—this dessert is guaranteed to become the highlight of any gathering. Its warm, comforting flavor profile appeals to all ages. The crunchy topping adds a playful element that keeps everyone coming back.
- Ingredient Quality: The recipe showcases the importance of fresh pumpkin puree and real spices for maximum flavor. Each component is chosen to complement the others, creating a cohesive taste experience. The use of real butter, not substitutes, elevates the overall richness.
- Cooking Method: Baking the filling and topping together allows the flavors to meld while keeping the crisp golden and firm. The simultaneous cooking ensures the custard sets properly while the topping achieves a perfect crunch. This technique saves time and effort.
- Make‑Ahead: You can prepare the filling in advance and bake just before serving, making it a perfect fall treat. The custard keeps well in the refrigerator for up to 48 hours, and the topping remains crisp until ready to serve. This flexibility makes the recipe ideal for holiday parties.
Inside the Ingredient List
The Flavor Base
The pumpkin puree is the soul of the dish, providing a natural sweetness and a deep, earthy undertone that only fresh pumpkin can deliver. It absorbs the spices and sugars, creating a smooth, velvety custard that coats your palate like silk. If you’re feeling adventurous, try using a homemade pumpkin puree for an extra layer of flavor; the difference is subtle but noticeable. Skipping this ingredient would leave the dessert feeling flat and uninspired, as the spices would have nothing to anchor themselves to.
Evaporated milk is a game‑changer that adds creaminess without the heaviness of heavy cream. Its slightly caramelized flavor complements the pumpkin’s natural sweetness, while its lower fat content keeps the custard light and airy. If you’re lactose intolerant, a plant‑based milk with a neutral flavor will work, but the texture may be slightly different. The key is to choose a milk that can thicken without becoming clumpy.
Eggs bind the mixture, giving the custard its structure and helping it set to a silky consistency. Two large eggs are sufficient for a four‑serving batch, ensuring that the filling is firm enough to hold its shape without becoming rubbery. If you prefer a dairy‑free version, use a flax egg or a commercial egg replacer to maintain the binding properties.
The Texture Crew
Old‑fashioned oats are the backbone of the crisp topping, providing a chewy, hearty texture that contrasts with the buttery crunch. They absorb the butter and sugar, forming a cohesive layer that melts slightly in the oven, creating a golden crust. Oats also add a subtle nutty flavor that deepens the overall taste profile. Skipping the oats would result in a topping that is too brittle and lacks body.
All‑purpose flour acts as a stabilizer in the topping, binding the oats, butter, and sugars together. It helps the crisp maintain its structure and prevents it from becoming too crumbly. A pinch of flour is enough; too much flour will make the topping dense and heavy. If you’re gluten‑free, swap the flour for a gluten‑free blend that has a similar binding quality.
Unsalted butter is the star that brings richness and a buttery aroma to the crisp. Cold butter, cut into cubes, creates pockets of melt that form a flaky, golden texture when baked. Butter also carries the spices, allowing their flavors to permeate the topping. Using salted butter would alter the final taste and could make the dessert too salty.
The Unexpected Star
Chopped nuts add a delightful crunch and a nutty undertone that complements the pumpkin and spices. Walnuts, pecans, or almonds work wonderfully, each bringing its own unique flavor. Nuts also add a subtle protein boost, making the dessert a little more satisfying. If you’re allergic or simply don’t want nuts, you can omit them without compromising the overall structure.
The optional nuts also help to balance the sweetness, providing a savory contrast that keeps the dessert from feeling cloying. Their toasted flavor enhances the caramel notes in the filling, creating a harmonious blend of sweet and nutty. The presence of nuts is not mandatory, but it elevates the overall experience.
The Final Flourish
A drizzle of maple syrup or a splash of bourbon can be added to the filling for an extra layer of depth. These additions provide a subtle sweetness and a warm, boozy note that pairs beautifully with the spices. If you prefer a dairy‑free version, a splash of coconut milk or a dash of almond extract can replace the maple syrup without losing the flavor profile.
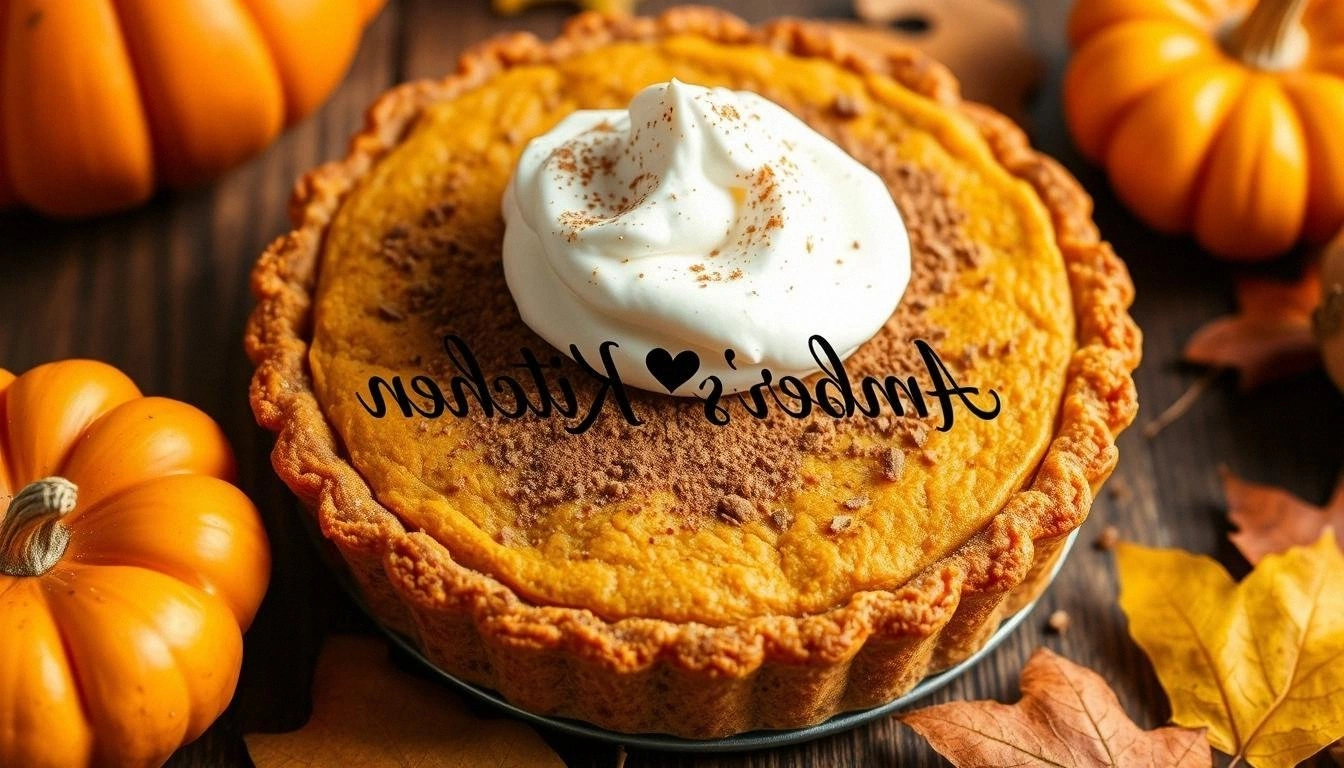
A dusting of powdered sugar or a swirl of whipped cream on top before serving adds a decorative touch and a hint of sweetness that balances the savory crunch. The contrast between the smooth topping and the sweet dusting is visually appealing and enhances the overall sensory experience. This final flourish is optional but highly recommended for a show‑stopping dessert.
The Method — Step by Step
- Preheat your oven to 350°F (175°C) and lightly grease a 9‑inch pie dish or a 2‑quart baking dish. This low, even heat ensures the custard sets slowly while the topping browns beautifully. The dish should be well‑lined to avoid sticking, which can ruin the crisp edges. If you’re using a cast‑iron skillet, the heat distribution will be even, giving a perfect crust.
- In a large mixing bowl, combine the pumpkin puree, evaporated milk, and vanilla extract. Whisk until the mixture is smooth and free of lumps. The vanilla adds a subtle floral note that balances the spices. The consistency should be thick enough to hold its shape but not so thick that it clumps.
- Add the granulated sugar, brown sugar, pumpkin pie spice, cinnamon, and salt to the pumpkin mixture. Stir until all the sugars are fully incorporated and the spices are evenly distributed. This step is crucial for a balanced flavor; the spices should be fragrant but not overpowering. The mixture should smell like a warm spice shop.
- Pour the custard into the prepared dish and smooth the top with a spatula. The surface should be even, allowing the topping to cook uniformly. A level surface also helps the custard set without bubbling over. This step ensures a consistent texture throughout the dish.
- In a separate bowl, combine the oats, flour, brown sugar, cinnamon, and salt. Mix until the dry ingredients are well blended. This dry mixture will form the crisp topping. The flour helps bind the oats, while the sugar provides a sweet caramelization.
- Sprinkle the oat mixture evenly over the custard. Press it lightly with the back of a spoon to ensure full coverage. The oats should sit on top, not dissolve into the custard. This step creates the signature crisp layer that will caramelize during baking.
- Bake for 30 minutes, or until the custard is set and the topping is golden brown. Remove the dish from the oven and let it cool for at least 10 minutes before serving. The custard will firm up further as it cools, giving a silky, stable bite. If you prefer a softer topping, reduce the baking time by five minutes.
- Serve warm, optionally topped with a swirl of vanilla ice cream, a drizzle of maple syrup, or a sprinkle of chopped nuts. The contrast between the warm custard and cold ice cream is irresistible. The maple syrup adds a caramelized sweetness that complements the spices. Enjoy it with friends or family for a memorable dessert experience.
Insider Tricks for Flawless Results
The Temperature Rule Nobody Follows
Many bakers rely on visual cues alone, but a thermometer guarantees that the custard is fully set. A temperature of 170°F ensures the proteins have coagulated, giving the custard a silky texture. Without this check, the custard may be runny or over‑cooked, ruining the overall experience. I once forgot to test the temperature, and the filling was too liquid; the lesson was costly.
Why Your Nose Knows Best
The aroma of the baking custard is a reliable indicator of doneness. When the custard emits a warm, caramelized scent, it’s almost ready. However, the scent can be misleading if the oven is uneven, so combine nose with a thermometer for best results. My friend once relied solely on the smell and over‑baked the crisp, resulting in a burnt top.
The 5‑Minute Rest That Changes Everything
Letting the crisp rest for five minutes after baking allows the custard to set further and the topping to firm up. This short pause prevents the custard from sliding off the dish when sliced. It also lets the flavors meld, creating a more cohesive taste. I’ve seen many people skip this step, and the result is a soggy, uneven dessert.
The Butter‑Butter Difference
Using cold butter is essential for a flaky topping. The cold butter creates steam pockets that puff up during baking, giving the crisp a light, airy texture. If you melt the butter before adding it to the oats, the topping will become dense and greasy. I once tried melted butter and the result was a flat, doughy crust.
The Sweet‑Spice Balance
Balancing sweet and spicy is key to a successful pumpkin crisp. Too much sugar can mask the spices, while too much spice can overpower the pumpkin. Adjust the sugar to your taste, but keep the spice ratio consistent. My first attempt was too sweet, so I added a pinch more cinnamon to balance it out.
Creative Twists and Variations
This recipe is a playground. Here are some of my favorite ways to switch things up:
Caramel‑Pecan Crunch
Swap the regular nuts for caramelized pecans for a sweet, nutty twist. Toast the pecans with a sprinkle of brown sugar until they’re golden, then fold them into the topping. The caramel adds a buttery sweetness that pairs wonderfully with the spices. This variation is perfect for a holiday gathering.
Chocolate‑Infused Delight
Add a handful of dark chocolate chips to the custard for a rich, chocolatey undertone. The chocolate melts into the pumpkin, creating a decadent flavor profile. Use semi‑sweet chocolate for the best balance between sweetness and bitterness. This version is a hit with chocolate lovers.
Coconut‑Lime Twist
Replace the evaporated milk with coconut milk and add a splash of lime zest to the custard. The coconut adds a tropical flavor, while the lime provides a bright, citrusy contrast. This version is a refreshing change of pace and works well for summer gatherings.
Spiced Apple Upgrade
Fold in diced apples into the custard for a fruitier texture. The apples add a subtle tartness that complements the spices. Use a firm apple variety like Granny Smith to avoid mushy bits. This variation is ideal for a family brunch.
Vegan Version
Use a plant‑based milk, flax eggs, and vegan butter to create a fully vegan crisp. The texture will be slightly different, but the flavor remains rich. Make sure to use a vegan butter that melts well for the crisp. This version is great for accommodating dietary restrictions.
Storing and Bringing It Back to Life
Fridge Storage
Store the cooled crisp in an airtight container in the refrigerator for up to 48 hours. The custard will remain firm, and the topping will stay crisp. If the topping starts to soften, you can re‑bake it at 350°F for 5 minutes to restore crispness. Keep the container sealed to prevent moisture from affecting the texture.
Freezer Friendly
For longer storage, wrap the crisp tightly in plastic wrap and place it in a freezer bag. Freeze for up to 3 months. Thaw overnight in the refrigerator before reheating. This method preserves the flavor and texture, making it a convenient option for busy weeks.
Best Reheating Method
Reheat the crisp in a pre‑heated oven at 300°F for 10 minutes, or until warmed through. Adding a splash of water to the bottom of the dish before reheating helps create steam, keeping the custard moist. Avoid microwaving, as it can make the custard rubbery. A quick oven reheat restores the original warmth and flavor.